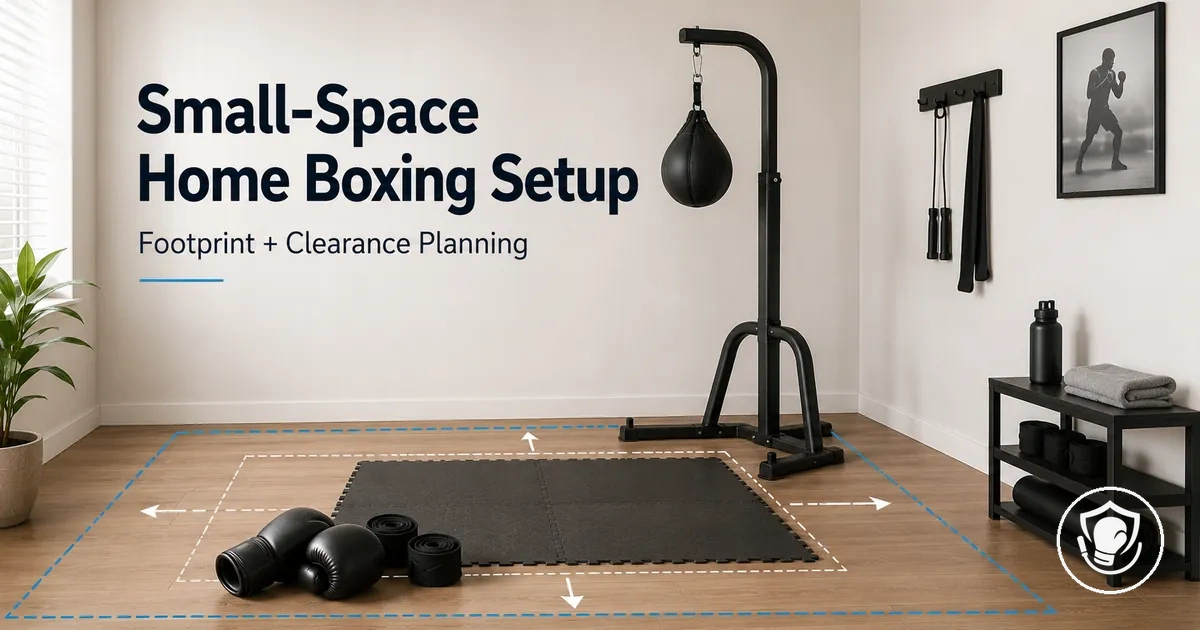
Beginner Home Boxing Setup for Small Spaces: Footprint, Clearance, and Equipment Fit
A beginner home boxing setup for small spaces means selecting and arranging punching bags, gloves, and training gear so that usable floor area, safe strike clearance, and equipment fit work together within the limited dimensions and structural limits of a room. It determines whether a bag can swing without hitting walls, whether you can move around it safely, and whether the setup can be stored without dominating the room.
Decision variables include usable footprint, clearance for punching and bag sway, mounting stability, noise and vibration limits, and storage reset burden. Fit outcomes depend on your specific room geometry and mounting options. The home boxing equipment hub offers a broader look at gear and planning.
Gather these measurements to judge equipment compatibility. They guide your choices by showing which bag types, stands, or mat sizes fit without awkward placement or unsafe gaps.
- Floor area available in feet (length × width)
- Ceiling height from floor to the lowest overhead obstacle
- Wall-to-wall distance on the side where the bag will hang or stand
- Floor type and load capacity (can it support a heavy base or mount?)
- Nearby furniture, doors, or pathways that reduce clear space
- Ability to drill into ceiling or wall versus need for a freestanding stand
A common misconception is that small space means tiny clearance. In reality, space-saving still needs clearance for full arm extension and bag movement. Safety depends on that gap, not room size alone.
Whether in a studio apartment or spare room, the same footprint and clearance variables apply.
What a “small-space boxing setup” includes and what it does not
A small-space boxing setup is a minimal station that preserves safe clearance while fitting into a shared room footprint.
What a small-space boxing setup includes and what it does not depends on the available clearance and room layout. A common misconception is that any compact gear automatically works in a tiny area; in reality, the setup still requires sufficient clearance and stable placement.
- Includes a compact bag (freestanding or wall-mounted) that fits within the room’s dimensions.
- Includes enough floor clearance to move around the bag without hitting walls or furniture.
- Includes a stable base or mount that remains stable during use.
- Includes a storage footprint that leaves the room usable when not training.
- Does not include permanent structural changes or full-room renovation.
- Does not include full-size hanging bags that demand tall ceilings and wide swing space.
- Does not include coaching, injury advice, or structured training plans.
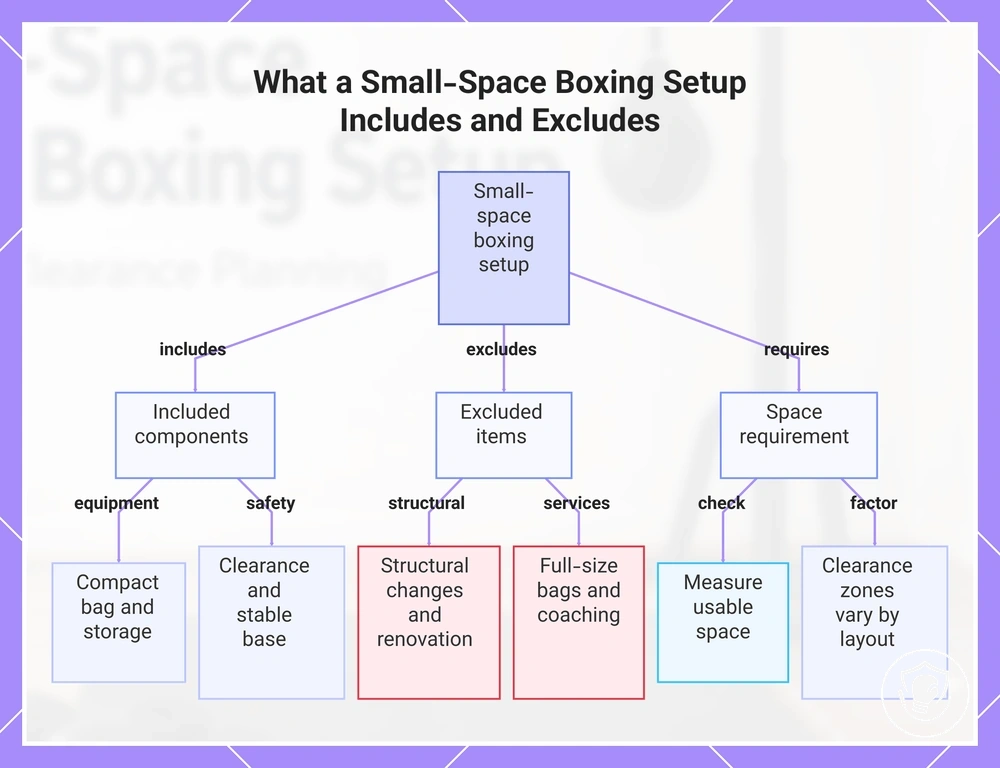
Equipment is chosen to minimize spatial impact. Required clearance zones depend on bag type and room layout. Measuring your usable space tells you whether it meets these minimum conditions.
This chart shows the essential components, exclusions, and space measurement requirement for a small-space boxing setup.
Measuring Usable Training Space: Footprint, Clearance, and Movement Lanes
Measure usable training space and clearance envelopes, not the total room size. Total room dimensions often include areas that can't be used for training because of obstacles, traffic paths, or access restrictions. The result is a usable footprint figure and a set of clearance notes.
To measure usable training space — footprint, clearance, and movement lanes — follow these steps. They help separate usable zones from blocked ones and give you a usable footprint and clearance notes.
- Measure the full room dimensions, including length and width, ignoring obstacles for now.
- Mark all fixed obstacles: columns, doorways, radiators, built‑in furniture, and windows that reduce wall space.
- Identify the main movement lanes: paths from the door to equipment positions and between stations.
- Subtract the area of obstacles and movement lanes from the total room area to estimate the usable footprint.
- Measure the distance from each potential equipment location to the nearest wall, obstacle, or doorway to define clearance envelopes.
- Record all measurements and notes for later equipment fit assessment.
Measuring usable training space: footprint, clearance, and movement lanes — the diagram labels usable vs blocked space and the clearance envelope for a typical room corner.
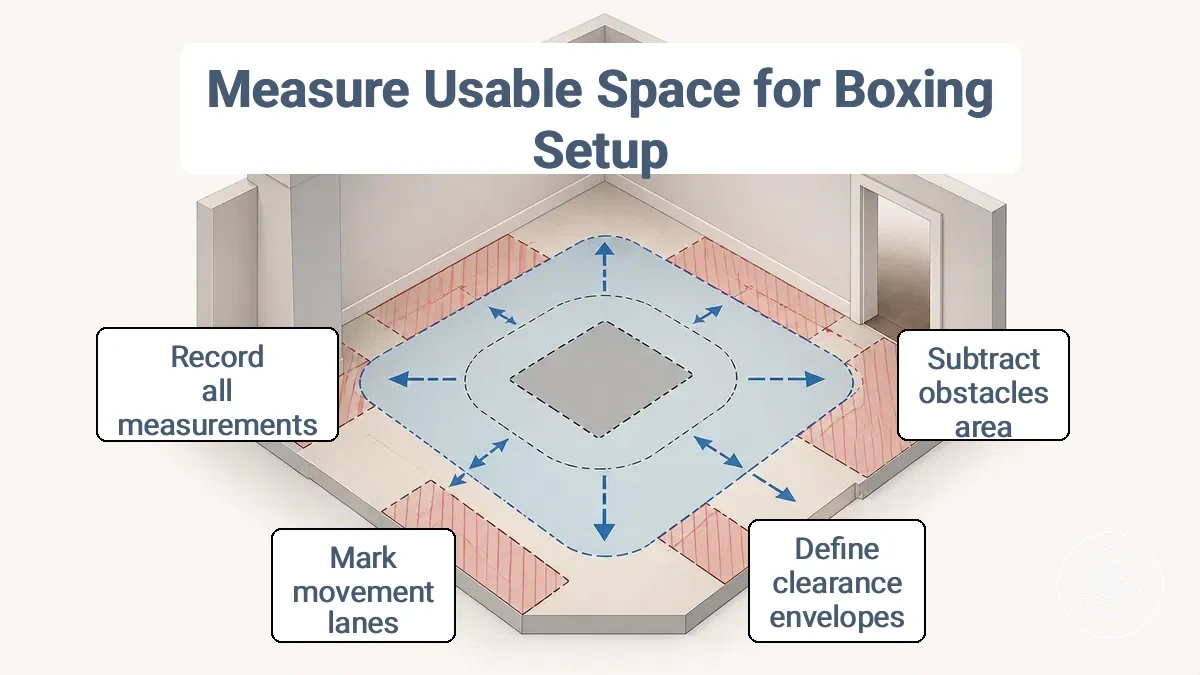
The clearance envelope for each piece of equipment needs to fit within the usable area, staying clear of blocked zones and traffic paths. Obstacles such as columns or narrow doorways can turn otherwise open floor space into blocked zones. Movement lanes cut across the room and reduce the area available for stationary equipment. The larger the clearance envelope required by a station type (for example, a punching bag requires more swing space than a floor mat), the more critical it is that the usable footprint is large enough and unobstructed. If blocked zones or movement lanes cut into the clearance envelope, equipment fit becomes risky and may force layout changes.
Consider a 12x12-foot room with a support column in one corner and a door centered on one wall. After subtracting the column footprint and the movement lane from the door to the opposite wall, the usable footprint may shrink to roughly 10x10 feet. If you place a heavy bag near the column, its clearance envelope would be partially blocked, potentially making full rotation unsafe. Clearance notes from the measurement process would warn about that blocked zone before any equipment is installed. Assuming room size equals usable space in this scenario can lead to a crowded or unsafe layout.
Usable Floor Footprint vs Blocked Footprint from Furniture and Pathways
Usable footprint is the floor area where you can stand and move without obstruction, while blocked footprint is space that appears open but is functionally taken up by furniture, pathways, or traffic lines. Furniture can leave a room visually open yet block movement, shrinking the usable footprint. Pathways, even when clear of objects, create reserved lanes that reduce usable space.
Use this checklist to verify your layout:
- Does the main walkway remain clear of furniture, even when seats are fully used?
- Is there enough turning space to move around furniture without hitting edges?
- Do door swings open into usable floor area rather than into a blocked zone?
- Are pathways interrupted by low tables or ottomans that create collision risk?
- Does the traffic line between key room entries stay unobstructed?
For example, a corner that looks clear can become unusable when a pathway cuts through it, turning a potentially usable nook into a blocked zone. The simple test: if you cannot stand and pivot freely, the space is blocked, not usable.
Vertical and lateral clearance: ceiling height, wall distance, and doorway swing
What boxing equipment fits in a small room depends on vertical and lateral clearance constraints. These constraints determine what can be mounted, swung, or struck with less risk of obstruction. Vertical clearance is the ceiling height above the station; it limits bag length, overhead reach, and the upward arc of strikes. Lateral clearance is the distance from walls and the arc of door swings; it restricts arm extension, bag swing, and the safe zone around the user. Doorway swing is a specific lateral constraint because a door opening into the space can reduce usable area and create collision risk.
Each room feature creates a specific risk based on its clearance type and limiting condition. Ceiling height limits bag length and upward arc if low; wall distance restricts arm extension and bag swing; doorway swing reduces usable area if the door opens into the space. The outcome varies by station type and strike intensity, because higher force increases the need for clear space to avoid impact. Clearance needs change with station type and strike intensity, while room obstacles remain fixed once measured.
Use the following mini-checklist to verify vertical and lateral clearance and identify the limiting constraint before selecting a station:
- Ceiling height measured at the intended mounting point; note any light fixtures or beams that reduce vertical clearance further.
- Distance from nearest wall to the center of the bag or user stance; this determines lateral clearance for arm swing and bag motion.
- Doorway swing arc mapped against the planned station footprint; confirm the door does not overlap with the strike zone or pathway needed for entry and exit.
- Floor space around the station that remains clear of furniture, posts, or other obstacles even after accounting for worst-case lateral movement.
After completing this checklist, mark the single limiting constraint—the measurement that forces the greatest compromise on station type or placement.
How much space you need for a heavy bag station in a home room
The space a heavy bag station needs depends on three factors: the bag's base footprint, its swing path, and the approach clearance for safe movement. A hanging bag requires room to swing without hitting walls or furniture, while a freestanding bag needs stable floor area to avoid tipping. A stand-mounted bag combines a base footprint with a limited swing envelope. Each type changes which dimension is the limiting factor.
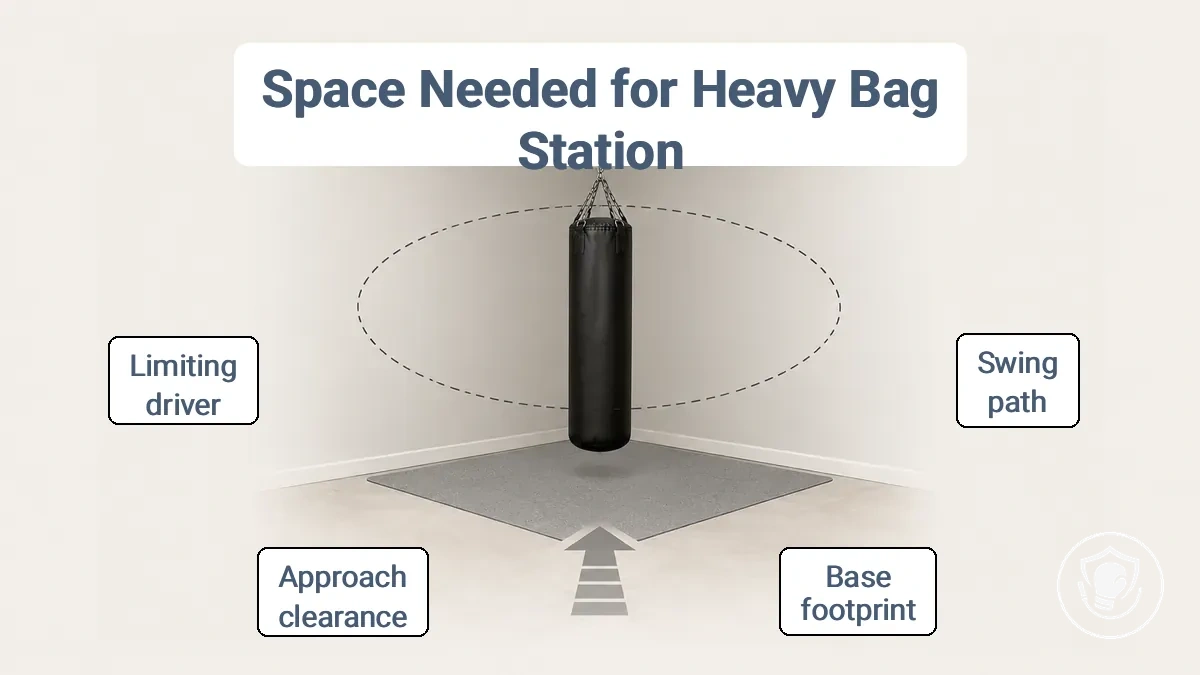
For a deeper comparison of the two most common setups, see hanging vs freestanding bag. How much space you need for a heavy bag station in a home room depends on the mounting style, and the table organizes these by what drives their space use, helping you identify which variable matters most for your setup. It shows the typical constraint and what to check for each type.
| Station type | Main space driver | Typical constraint cue | What to check |
|---|---|---|---|
| Hanging | Swing path | Adequate swing clearance around the bag | Ceiling height, joist strength, swing radius from center |
| Stand | Base footprint + swing | Sufficient floor space and wall buffer | Frame stability, approach distance from all sides |
| Freestanding | Base footprint + wobble | Clear space around the base | Base weight, floor grip, ability to step back |
The limiting driver is the factor that demands the most room. For a hanging bag, swing path often exceeds the base footprint; for freestanding models, the base size and wobble zone can dominate. Choose the station type whose limiting driver your room can accommodate without limiting heavy bag vs pads comparison. Verify which constraint applies first before committing to a layout.
Consider a room corner that seems ideal for a heavy bag station: walls on two sides, floor space around 5x5 feet. A hanging bag mounted in the corner looks like it fits, but once the bag swings, it can strike the wall within the first punch if the swing radius exceeds the distance to the wall. Freestanding bags in corners also fail when the base wobbles or the user cannot step back far enough, creating a safety risk. 'Fits in the corner' is not enough; you should re-check swing path and approach clearance before confirming the setup.
Bag footprint vs. bag swing path: what changes when you hit harder
The swing path of a heavy bag, not its stationary footprint, determines the effective space needed when you hit it. Swing path refers to the arc the bag travels through after impact. The footprint stays fixed, but the swing path changes with strike intensity. When you strike harder, the bag swings with more energy, increasing the clearance required.
Bag footprint vs bag swing path: the following variables widen the clearance beyond the base footprint:
- Bag length – A longer bag can create a larger swing radius, requiring more lateral and vertical space.
- Mounting height – How high the bag is hung affects the swing arc; a lower mount can cause the bag to swing more at the bottom, altering the effective space.
- Stand wobble – Any flex or instability in the stand adds unpredictable movement, expanding the clearance zone.
- Nearby obstacles – Walls, posts, or other equipment become collision risks when the swing path extends further under harder hits.
In low-ceiling spaces, the bag's upward swing path becomes the limiting factor, even if the floor footprint seems adequate.
Stand and mount compatibility: stability, anchoring, and floor-load limits
Stand and mount compatibility starts with verifying three stability factors: tipping resistance, sliding resistance, and load path through anchoring. These depend on floor surface grip, wall anchoring strength, and how the hardware manages applied forces. Skipping these checks raises the risk of tipping, sliding, or wall damage. When evaluating a mounting option, first separate a stability issue (wobble, tipping, sliding) from a compatibility issue (mounting pattern or weight capacity). Stability hinges on surface and anchoring, not weight ratings alone.
To screen for stand and mount compatibility, run through this short checklist before finalizing your setup:
- Check if the floor surface is smooth or textured; smooth surfaces reduce friction and increase sliding risk.
- Ensure the stand base has enough footprint relative to the bag size to reduce tipping risk from a narrow base under a heavy bag.
- Verify that the wall mount is anchored into solid structural material (stud, concrete) and not into drywall alone, as hollow wall voids without toggle bolts can fail under dynamic stress.
- Confirm that the mount or stand includes anti-slip pads or gripping feet if placed on smooth flooring; without them, sliding may occur even under moderate strike intensity.
- Assess whether the stand can be further secured with add-on stability braces or floor-mount kits. Some units allow bolt-through anchoring.
- Consider the training intensity: heavy bags or rapid movements may amplify wobble, even if the mount feels secure statically.
Contrast smooth ceramic tile with a grippy rubber mat on concrete. On smooth tile, a top-heavy stand can slide after a few strikes, even with non-slip feet, unless the base is wide or weighted. On grippy flooring, the same stand stays in place because friction offsets the horizontal force. The conservative rule is to assume the worst-case floor condition and choose a stand or mount with more stability margin than your room appears to need.
Wall-mounted pads and compact striking surfaces: fit checks before you buy
Wall-mounted pads and compact striking surfaces can reduce your floor footprint, but they shift the space requirements to the wall, the height, and the contact zone around the target. Wall type determines what fasteners or anchors are needed. Height determines whether you can practice full-range punches, elbows, or kicks without hitting the ceiling or floor. The contact zone – the area your gloves or feet strike – must be free of obstructions and aligned with your natural striking path.
The mounting decision splits into two main checks: fit to the wall and fit to the user's height and clearance. Fit to the wall depends on the wall construction – drywall, concrete, brick, or stud framing – and the compatibility of the pad's fasteners with that surface. Fit to the user's height and clearance depends on the mounting height of the target, the size of the striking surface, and the space needed for punches, kicks, or knee strikes without colliding with walls, ceiling, or furniture. Both checks must pass; a systematic fit check before purchase catches mismatches. The annotated example below shows wall type constraints, target height, and the safe contact zone for wall-mounted pads and compact striking surfaces: fit checks before you buy.
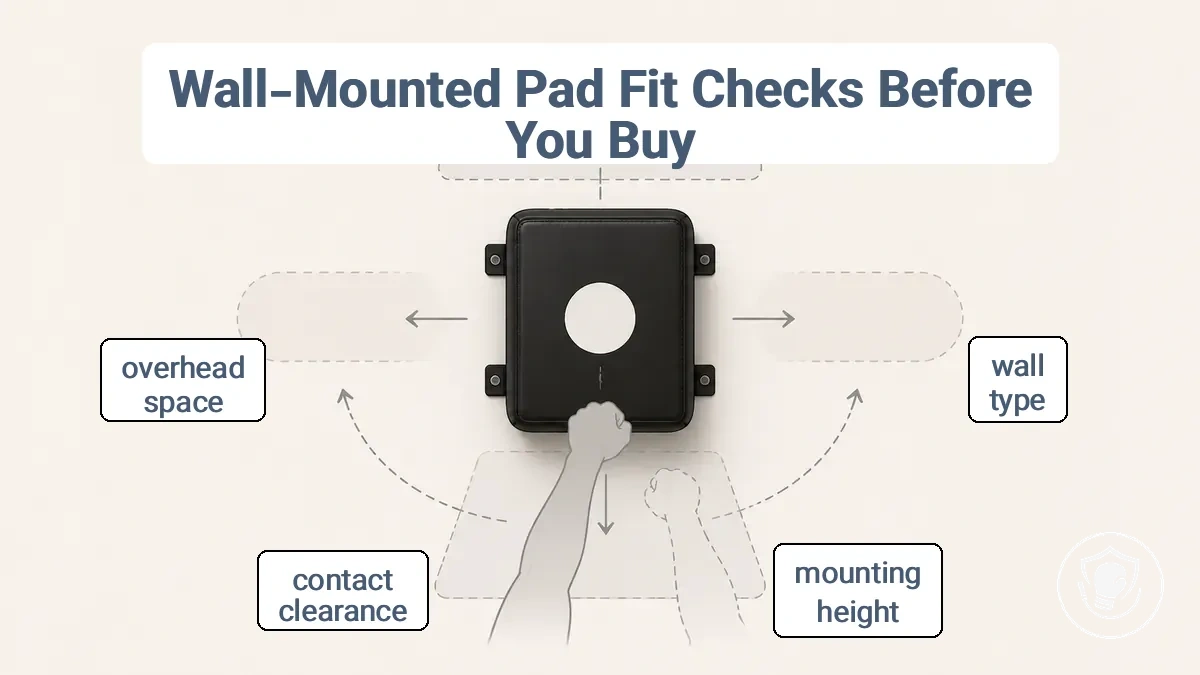
Wall-mounted pads and compact striking surfaces: fit checks before you buy – this checklist verifies wall and clearance compatibility. If any check fails, choose a different target type or placement.
- Wall type: Identify the surface (drywall, concrete, masonry, wood stud, metal stud) and confirm the pad's mounting system works with it.
- Stud spacing or anchor capacity: Locate studs or choose rated anchors that match the pad's weight and impact force.
- Fastener load rating: Check that the included or recommended fasteners can handle repeated strikes without pulling out.
- Target height: Adjust the mounting height so the center of the pad aligns with your typical striking zone (waist to shoulder for punches, head height for elbows).
- Contact zone clearance: Ensure enough space around the pad for full striking extension without hitting a wall or obstacle.
- Glove clearance above and below: Verify that your gloves or feet can move past the pad edges without scraping the wall or floor.
- Overhead clearance: Ceiling height must allow overhead strikes (uppercuts, elbows, kicks) without contacting the ceiling.
- Obstacles in the swing path: Remove or work around light fixtures, window frames, door handles, shelves, or furniture near the target.
- Floor clearance for kicks: If the pad includes a low kick surface, confirm the floor area is free of rugs, cords, or toe-stubbing hazards.
A common assumption is that any wall can support a wall-mounted pad. In reality, compatibility depends on wall construction and fastener limits. For renters, reversible mounting options (such as tension-mounted or adhesive fixtures) may reduce damage, but they still require adequate wall surface and clearance. Even with reversible constraints, height and contact zone checks remain necessary; they only change the mounting method, not the need for clearance.
Wall type and mounting constraints in apartments and rental rooms
Wall type determines mounting feasibility and failure risk in apartments and rental rooms. The main categories include masonry (brick or concrete), stud walls (drywall attached to wood or metal studs), and hollow partitions (drywall with no backing), each with different fastener limits and impact tolerance. Masonry can support heavier loads but needs specialized fasteners. Stud walls can hold weight when anchors reach wooden studs. Hollow partitions have low holding capacity and can damage easily. Unknown wall type increases risk.
Wall type and mounting constraints in apartments and rental rooms are summarized in the table below, which maps each wall type to common constraints, failure risk cues, and conservative actions.
| Wall type | Common constraint | Failure risk cue | Conservative action |
|---|---|---|---|
| Masonry | Hard material; requires masonry bit and anchors | Screw may not penetrate; cracks may appear | Use designated masonry anchors; limit to medium-weight items |
| Stud wall | Should locate studs; anchors alone may not hold | Stud finder may show no solid back; anchor may spin | Attach directly to studs or use heavy-duty toggle bolts |
| Hollow partition | No backing; thin drywall | Drywall may crumble or dimple | Use adhesive-only mounting or lightweight items; avoid screws |
| Unknown | No reliable fastener target | Any sign of hollow or hard spot inconsistent | Default to adhesive mounts and keep weight low |
For unknown wall type, the conservative fallback is to avoid drilling entirely and use high-bond adhesive strips or freestanding alternatives, keeping weight low.
Target Height and Safe Contact Zone for Beginners in Tight Spaces
The target height and safe contact zone depend on the user's height, stance distance, and the available clearance in the room. A properly sized zone helps reduce awkward strikes and accidental contact with walls or furniture. Stance distance determines how far the user stands from the target, which affects the required clear space. Glove clearance around the target is needed to swing without hitting obstacles. A verification check of these factors helps avoid misplacement.
To set the target height and safe contact zone in a tight space, run through these placement checks:
- User height range – Target height should offer an adjustable range for comfortable striking; a fixed height risks awkward posture and missed strikes.
- Stance distance – Measure stance distance: too close reduces power, too far risks leaning and losing balance.
- Glove clearance – Ensure enough space around the target for full arm extension without hitting walls, furniture, or other obstacles.
- Obstacle proximity – Identify nearby objects like shelves, door frames, or other equipment; if they are within the swing path, move the target or adjust the contact zone.
Each check affects placement. For example, in a narrow room the available width may force the target closer to the wall, requiring a stricter contact-zone limit to prevent glove impact. When space is tight, a conservative placement rule—keeping the target centered with at least full arm‑length clearance on each side—can reduce accidental contact.
Floor space solutions: foldable mats, surface grip, and movement comfort
Floor space solutions change traction, comfort, and storage footprint more than they change clearance needs. A foldable mat adds surface grip underfoot, can reduce impact on joints through its thickness and damping, and folds away to reset the room for other uses. Unlike permanent flooring, these mats let you adapt the space without sacrificing movement comfort.
More grip and cushioning usually require a thicker mat, which increases storage footprint when stowed. Floor space solutions—foldable mats, surface grip, and movement comfort—differ in grip, thickness, and storage footprint. The following table compares them across these attributes.
| Option | Grip/traction | Thickness/comfort | Storage footprint | Best small-space use |
|---|---|---|---|---|
| Low-profile foldable mat | Moderate (surface texture) | Minimal cushioning, slight vibration reduction | Compact fold, easy stowability | Static exercises, yoga, light stretching |
| Cushioned foldable mat | Good (anti-slip bottom) | Medium cushioning, joint comfort | Moderate fold, some bulk | Bodyweight training, Pilates, floor work |
| Thick cushioned foldable mat | High (textured surface) | High cushioning, strong damping | Larger folded size, less stowable | High-impact drills, boxing shadowwork |
For boxing and high-impact drills, where ground contact is frequent, floor protection for boxing setups becomes a key criterion even if it adds bulk, as traction and joint comfort must be weighed against stowability. On slippery tile or uneven concrete, the decision signals shift. Grip becomes the primary filter; a mat that slides underfoot increases slip risk regardless of its comfort. A thinner mat with a high-friction bottom may outperform a thicker one that lacks traction on that surface. Before committing, place the mat on the actual floor and perform a few lateral movements to verify that it stays in place and meets both movement comfort and safety needs.
Noise and vibration constraints that affect what equipment can fit
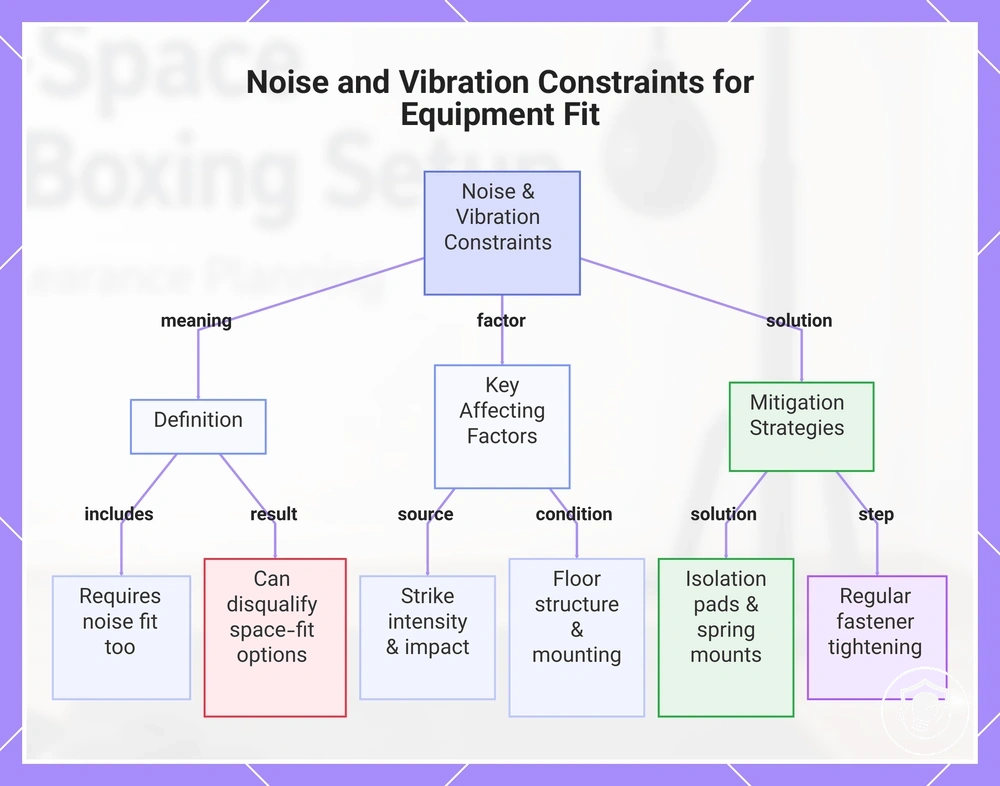
Noise and vibration are compatibility constraints in shared buildings and can disqualify otherwise space-fitting options. A bag that fits the square footage may still create unacceptable impact transmission through the floor or audible thuds that carry through walls. Whether this happens depends on the building structure, the type of mounting, and the strike intensity from your training. Fit includes both space fit and noise fit; evaluating only the dimensions of the equipment can lead to surprises after installation.
Noise and vibration constraints that affect what equipment can fit come from specific sources and mitigation levers. For more targeted strategies, see noise reduction for home boxing. Identifying them early helps you plan a setup that stays within acceptable limits for your environment. Common factors include:
- Strike intensity from heavy bag impacts and heavy punches
- Floor transmission through wooden joists versus concrete slabs
- Mounting point rigidity: ceiling attachment versus freestanding frame
- Resonance of floor or adjacent panels that amplify low frequencies
- Proximity to shared walls, bedrooms, or quiet zones
- Type of bag: hanging bags transfer more vibration to structure
- Use of isolation pads, rubber mats, or spring-loaded mounts
- Regular tightening of fasteners to prevent looseness that adds noise
Mitigation is conditional on the specific combination of equipment, building, and training habits.
Consider an apartment with wooden floor joists and a hanging heavy bag. The impact from each punch travels through the bag, into the ceiling mount, and radiates across the floor and walls. Neighbors in adjacent units may hear a dull thud or feel vibration even at moderate strike intensity. The same bag installed in a garage with a concrete slab floor transmits far less vibration to occupied spaces, though the noise from the bag itself may still echo. The conservative decision is to assume that any vibrating or impacting equipment can disturb neighbors unless you have tested the setup at full intensity and can confirm the isolation measures work.
This chart explains how noise and vibration act as compatibility constraints in shared buildings, including key factors and mitigation strategies.
Space-Saving Equipment Choices That Keep the Same Training Outcomes
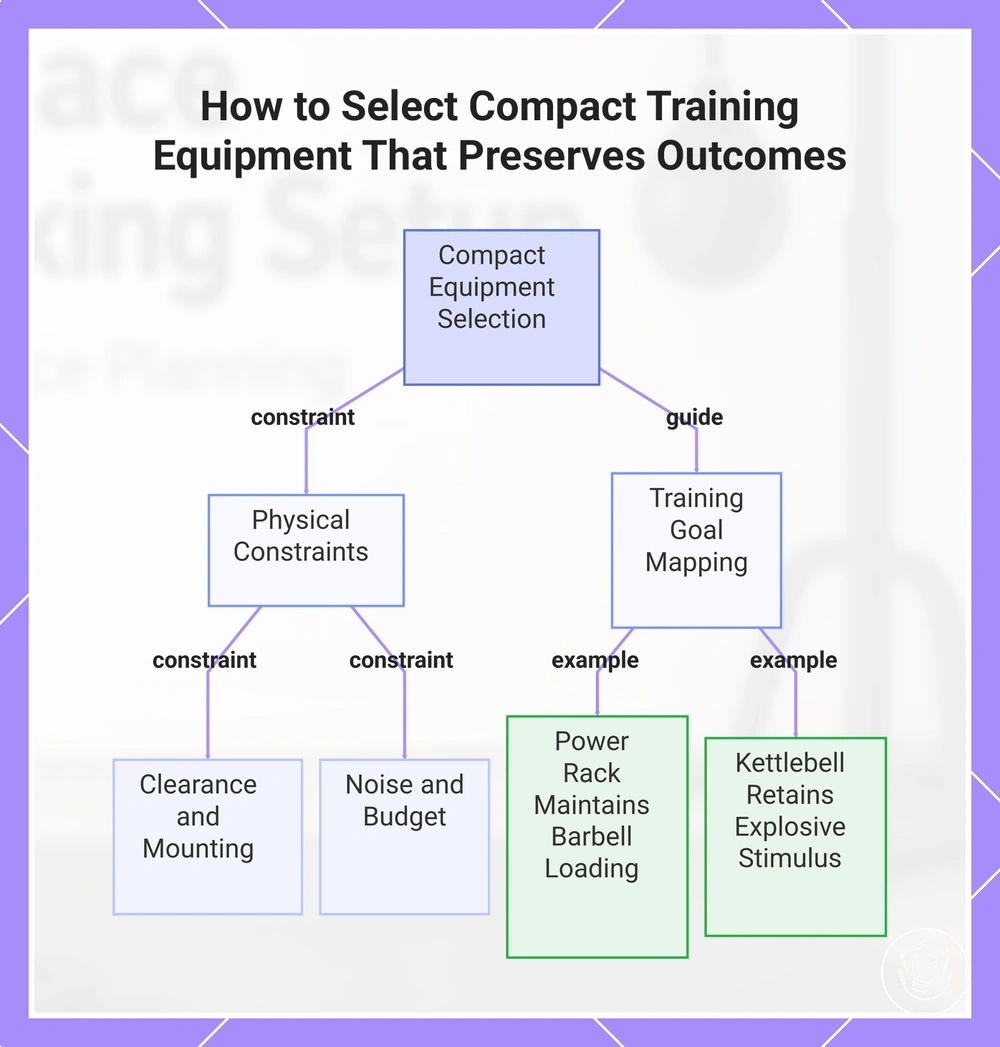
Space-saving equipment choices that keep the same training outcomes depend on whether a compact option can preserve the required stimulus and feedback under tighter clearance and mounting constraints. When floor space is limited, foldable racks, adjustable weights, or wall-mounted anchors can mimic the forces and feedback patterns of full-sized gear, but not always with the same stability or range. Clearance, mounting, and noise constraints often determine whether a substitution works for a given training goal. Decision signals—like whether your goal requires heavy resistance, explosive movement, or precise targeting—help separate effective compact options from those that compromise too much, making the same outcome and a smaller footprint conditional on your specific constraints.
Mapping training goals to compact alternatives starts by matching the required stimulus and feedback to the form factors available. For example, a power rack offers stability for lifts but requires overhead clearance; a wall-mounted folding rack provides similar function but demands secure mounting. Adjustable dumbbells replace a full set of fixed weights, yet their weight-change mechanism and handle width can affect feel during rapid transitions. When space is tight, the question is whether compact equipment can deliver the required training stimulus. Common training goals map to required feedback, space constraints, and acceptable compact substitutes:
- Strength development (squats, presses, rows): requires heavy load and stable support → constraint: limited floor area → compact power rack or squat stands with safeties → trade-off: reduced overhead space but can maintain barbell loading and progressive overload.
- Explosive power (kettlebell swings, medicine ball throws): requires impact absorption and room for full extension → constraint: low ceiling → adjustable kettlebell or compact plyo box → trade-off: reduced trajectory range but can retain explosive stimulus and hip drive.
- Cardiovascular conditioning (jump rope, shadow boxing, interval work): requires clear floor space and low noise → constraint: apartment or shared room → jump rope, foldable mat, or compact air bike → trade-off: less impact dampening but can maintain heart rate elevation and footwork practice.
- Core and rotational stability (planks, Russian twists, cable rotations): requires variable resistance angles → constraint: no wall space for pulldown or cable stacks → resistance bands with door anchor or suspension trainer → trade-off: less progressive load but can cover multiple movement planes and core engagement.
- Accessory and unilateral work (dumbbell rows, lunges, arm curls): requires multiple weight increments and comfortable grip → constraint: limited storage → adjustable dumbbells → trade-off: slower weight changes and potentially bulkier handle, but can cover most needed loads.
- Speed and agility (footwork drills, ladder work): requires open floor area for multidirectional movement → constraint: small room → agility ladder, jump rope, or shadow boxing in a marked square → trade-off: less dynamic resistance but technique and proprioception can still be trained.
- Pulling strength (pull-ups, rows): requires vertical pull capacity → constraint: doorframe or stud spacing → doorframe pull-up bar or wall-mounted power rack → trade-off: limited grip variations but can maintain bodyweight pulling progress.
When choosing, first identify the limiting constraint—clearance, mounting, noise, or budget—then match the compact option that meets it without fully sacrificing the required feedback.
Consider a trainee whose primary goal is developing punching power through heavy bag work but whose space only has 7-foot ceilings and limited wall strength. A ceiling-hung bag may limit swing and risk hitting the floor; a freestanding bag often consumes more floor area and may still wobble. The compact substitute—a wall-mount arm with a shorter bag—reduces realism because the rebound is stiffer, but it preserves the ability to practice impact timing and resistance. The trade-off is between stability and realism: you lose some feel but gain a safer fit for the room. The choice depends on which attribute you are least willing to compromise. No single compact option works in every setting; decision signals about your training stimulus needs and physical constraints guide the selection.
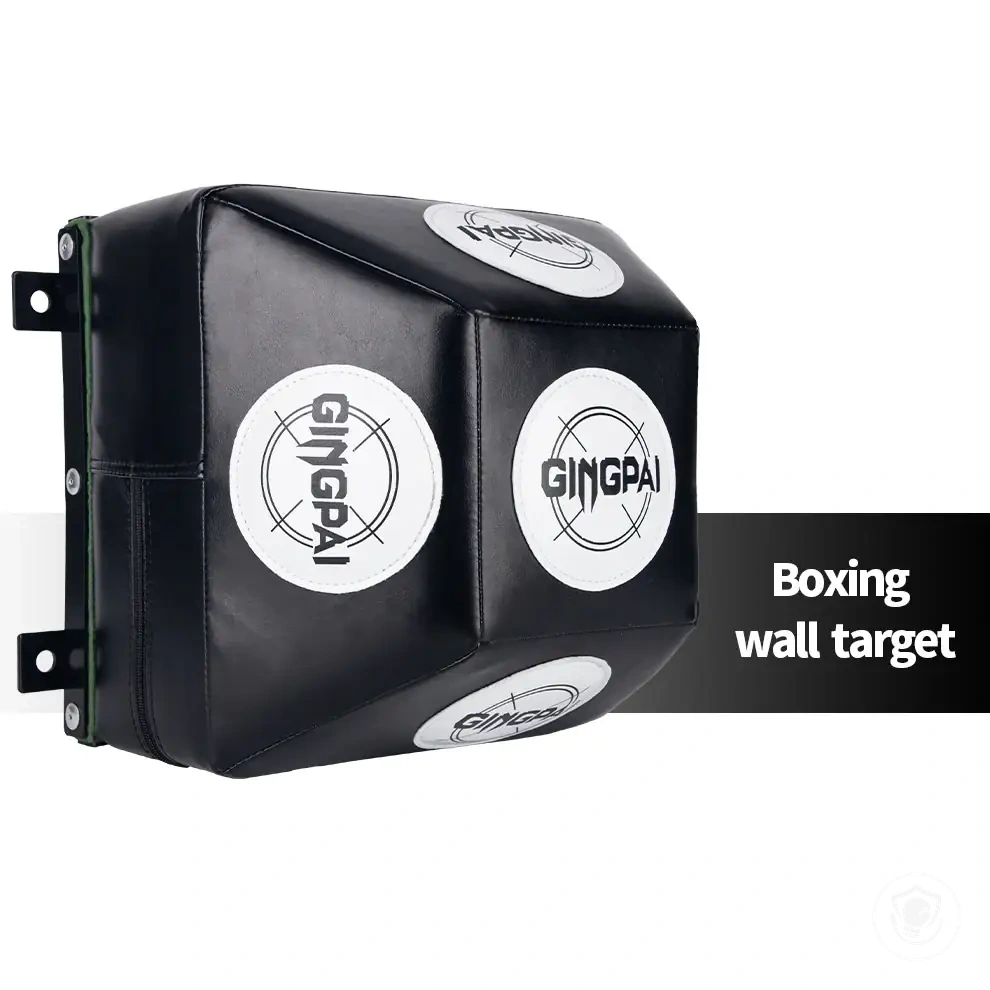
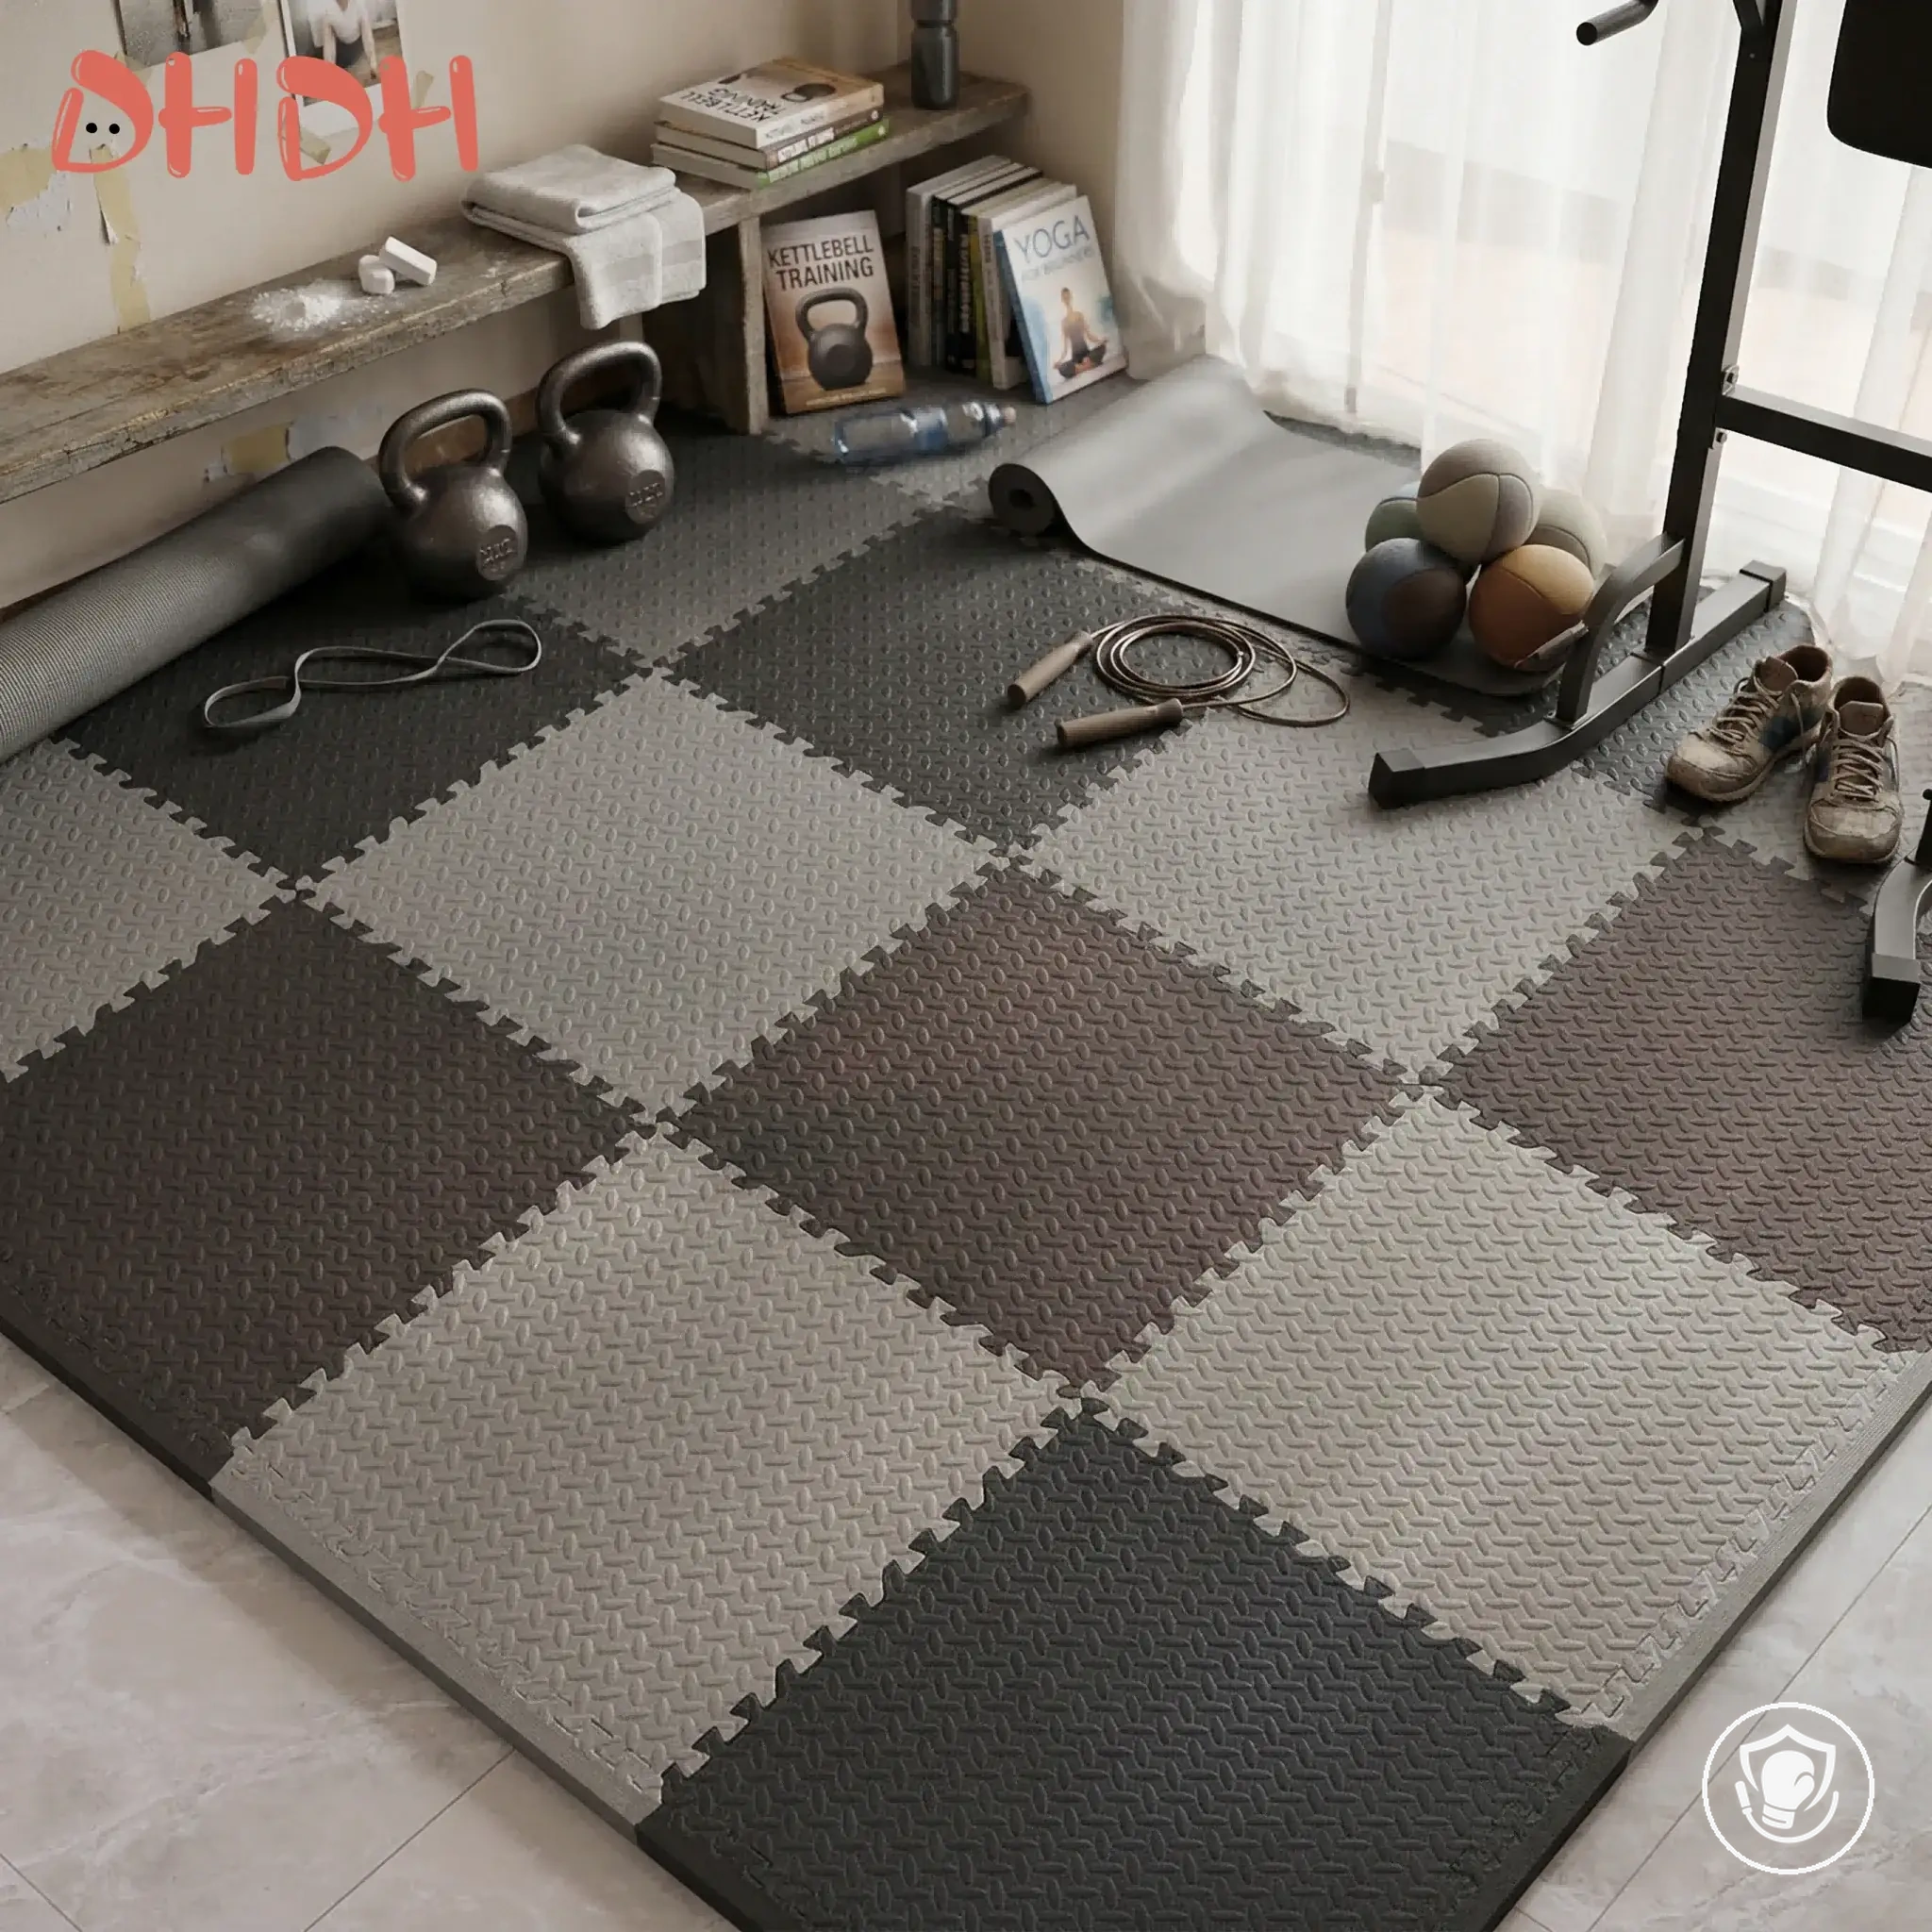
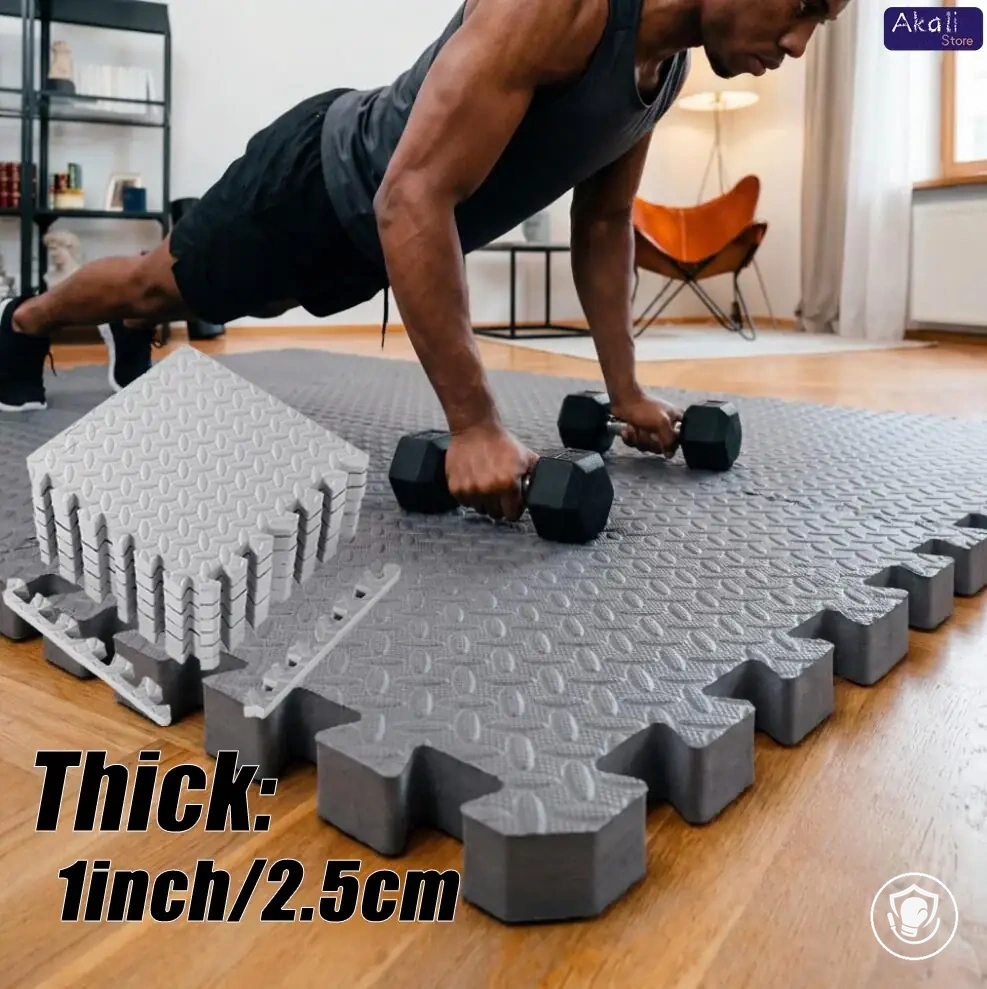
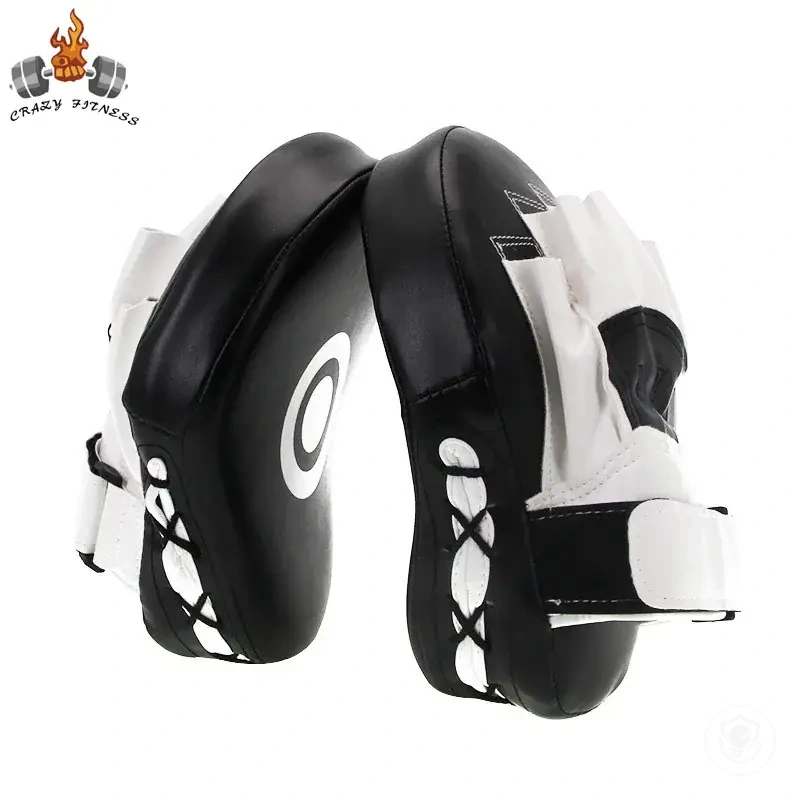
Here are product examples that may make comparison easier. Before buying, always review the compatibility criteria, essential features, and product details.

This chart shows how to choose compact fitness equipment by evaluating physical constraints and mapping training goals to suitable alternatives with their key trade-offs.
Storage and reset design for small-space boxing gear
In a small-space boxing setup, storage is a fit variable: gear must be placed so it does not block movement lanes or consume the usable training footprint. A common mistake is storing gear where it blocks movement lanes — for example, leaving a heavy bag stand in the center of the room or stacking gloves near the path used for shadowboxing. The location often depends on room traffic and available wall space. Stowing gear properly preserves movement lanes and lets the same floor area serve both storage and training without constant rearrangement.
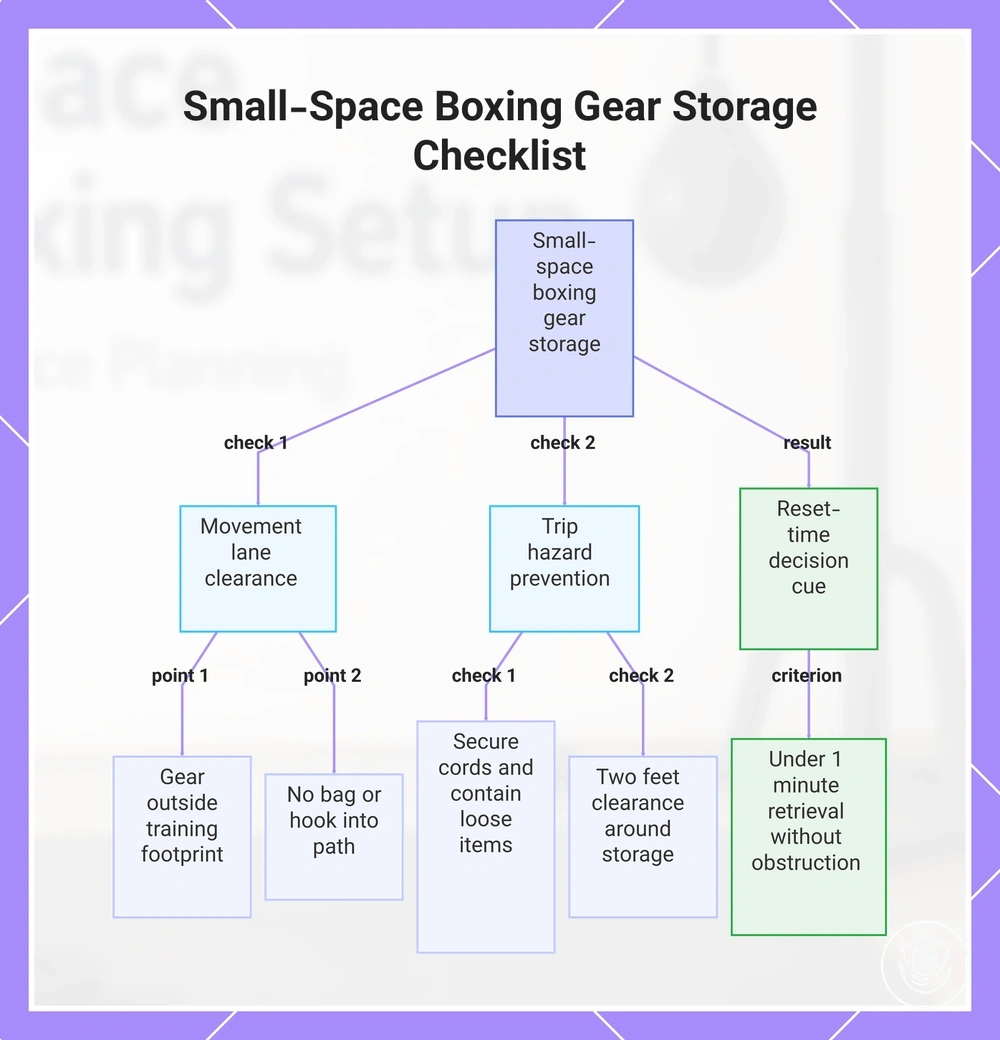
This checklist verifies that your storage and reset design for small-space boxing gear keeps movement lanes clear and presents no trip hazard after gear is put away.
- Gear is stored outside the training footprint (e.g., along walls, under furniture, behind a closed door).
- No bag, rack, or hook extends into the path used for punches, footwork, or kettlebell swings.
- Cords, straps, or hanging loops are secured so they do not snag feet or equipment.
- Loose items like hand wraps and jump ropes are contained in a bin or basket rather than left on the floor.
- The area around the storage point has at least two feet of clearance on each side where you normally move.
If any of these checks fails, the storage location creates a trip hazard and reduces daily usability.
Consider three common small-space scenarios. Closet storage is out of sight, but limited ventilation can trap moisture in gloves if the door stays closed — air them out before closing. Under-bed storage keeps gear below the line of sight and frees floor space, but accessing it requires lifting the bed or pulling a bin, which adds a few seconds to reset time. Wall-mounted hooks place gear at eye level, allowing quick grab-and-go access, but they must be anchored into studs or drywall anchors to avoid pulling loose during heavy use. The reset-time decision cue is simple: if you can retrieve and stow your full gear set in under a minute without obstructing the training area, the storage method fits your small-space boxing setup.
This chart shows the main checks for storing boxing gear in a small space to keep movement lanes clear and avoid trip hazards, plus the key decision cue for a fit storage method.
Compatibility-first checklist for choosing a safe small-space configuration
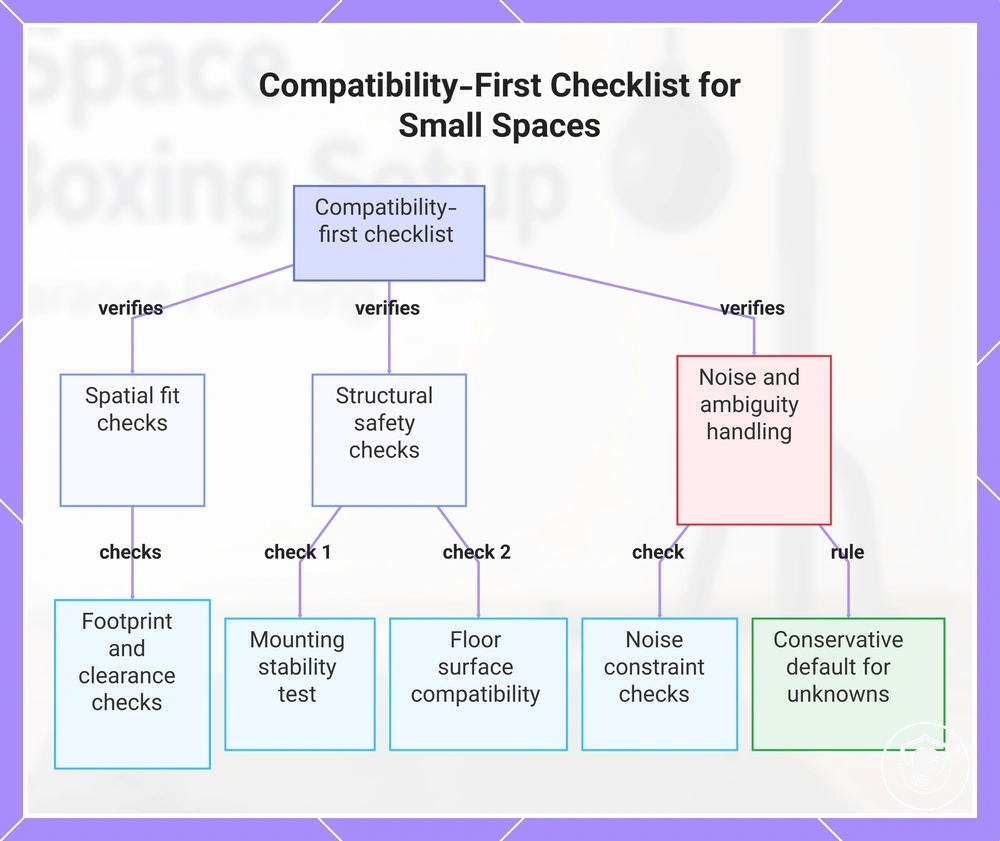
A compatibility-first checklist acts as a final screen before you lock in a small-space configuration. It groups checks by footprint, clearance, mounting stability, floor surface, and noise constraints. Each check becomes a verifiable pass/fail condition that compares a setup option against a specific constraint. A failed check indicates the configuration is unsuitable for that dimension of your space.
This compatibility-first checklist for choosing a safe small-space configuration verifies pass/fail constraints across five groups:
- Footprint:
- Does the base area of the setup fit within the available floor space?
- Does it leave sufficient clear space on each access side?
- Does the footprint avoid overlapping with door swings or heating vents?
- Clearance:
- Are there sufficient unobstructed pathway around the setup?
- Is there enough headroom (e.g., for a punch bag or overhead mount)?
- Does the setup avoid blocking windows, radiators, or built-in storage doors?
- Mounting stability:
- If the setup relies on wall mounts, is the wall type (stud, masonry, or plaster) known and suitable?
- Does the mounting hardware exceed the setup's expected load?
- Does the setup resist tipping or sliding when used at full force?
- Floor surface:
- Does the floor provide enough grip to prevent the setup from sliding?
- Is the material (tile, hardwood, carpet, vinyl) compatible with the setup's base or mat?
- Does the surface offer sufficient damping for impact to avoid damage to the subfloor?
- Noise constraints:
- Does the setup generate vibration that could disturb neighbours in a shared building?
- Are there soft pads or mats to reduce structure-borne noise?
- Does the setup's operating noise stay within acceptable levels for the time of day it will be used?
Note that some constraints may be ambiguous. For example, you might not know the wall composition behind a plasterboard finish, or the setup might sit next to a shared hallway with unpredictable foot traffic. In such cases, default to the conservative choice—assume the wall cannot safely hold a heavy mount, or position the setup away from the traffic lane. This safer/lower-impact rule helps you avoid a risky installation even when information is incomplete.
Here are product examples that may make comparison easier. Before buying, always review the compatibility criteria, essential features, and product details.
This chart shows the main verification groups and the rule for handling ambiguous constraints when choosing a safe small-space configuration.