
How to Clean and Dry Beginner Boxing Gear for Odor Control
Cleaning and drying beginner boxing gear for odor control involves caring for boxing gloves, hand wraps, and basic contact points without relying on shopping lists, brand-specific instructions, or medical claims. The goal is to keep moisture low through repeatable habits, not specialized products or gear replacement.
Odor control in boxing equipment is moisture control plus gentle cleaning. Focus on a consistent drying routine and regular wipe-downs after each session, and wash hand wraps often to prevent odor transfer into gloves. Airflow and ventilation during storage reduce mildew risk by preventing moisture from trapping inside glove linings. Visit the home boxing equipment for beginners hub for more on beginner gear.
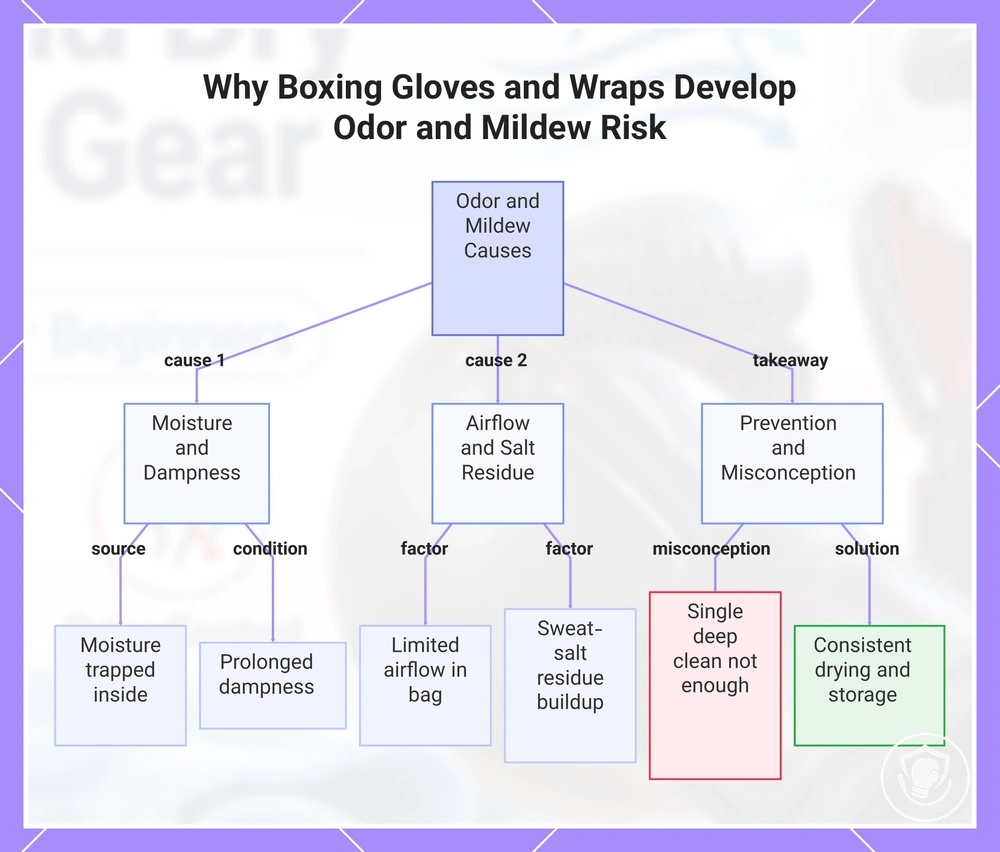
Why Boxing Gloves and Wraps Develop Odor and Mildew Risk
Boxing gloves and wraps develop odor and mildew risk because sweat and moisture become trapped inside the glove lining and wrap fabric. This damp environment persists long after training, especially when stored in a closed bag.
Odor from a damp glove lining is typically musty and persistent, while odor from reused wraps tends to be sharper due to sweat‑salt residue.
The severity of odor and mildew depends on how quickly the equipment dries: limited airflow and high humidity lengthen drying time and raise mildew risk. Sweat‑salt residue left in the fabric can also contribute to stiffness and a lingering musty smell. The main factors that cause odor and mildew risk are:
- Moisture retention in the glove lining and wrap fabric
- Limited airflow inside the gloves after training
- Prolonged dampness before the equipment dries fully
- Sweat‑salt buildup in the wraps and lining
Many boxers believe a single deep clean will solve the problem, but prevention through consistent drying and proper storage usually matters more.
This chart explains the main causes of odor and mildew risk in boxing gloves and wraps, including moisture, airflow, and salt residue, and highlights the importance of prevention over deep cleaning.
Material and safety checks before cleaning or drying
The safest default is minimal moisture, gentle cleaners, and full ventilation, adjusted to the glove’s outer material and lining. This helps prevent cracking, delamination, and trapped dampness that can shorten glove life. Using too much water or aggressive chemicals can damage padding and cause odors to return. When in doubt, default to the least aggressive method and more airflow.
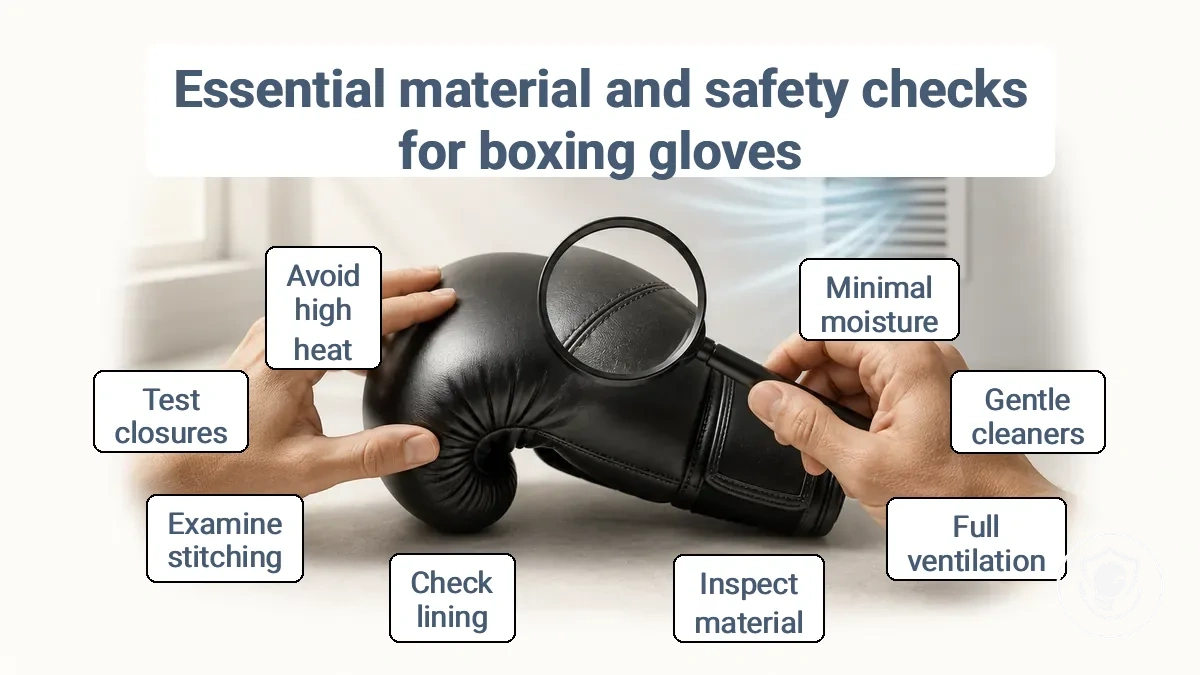
Material and safety checks before cleaning or drying matter because different glove materials and linings react differently to water, heat, and cleaners. A quick inspection can reveal weak points. A short checklist verifies key durability and wear points—the outer material, glove lining, stitching, seams, and closures—to guide your cleaning method and prevent damage or odor recurrence.
- Inspect the outer material (synthetic leather or leather) for cracks or peeling → clean with a damp cloth and mild soap.
- Check the glove lining for dampness or residual odor → allow to air dry fully in a ventilated space before storing.
- Examine stitching and seams for fraying or loose threads → avoid overwetting; spot clean these areas and extend drying time.
- Test closures (Velcro or lace) for wear or stiffness → clean gently with a soft brush and avoid soaking.
- Ensure the drying area is away from radiators, ovens, or direct sunlight.
- Verify the cleaning solution is mild and non-abrasive → use a cleaner intended for the specific outer material and lining type.
- Confirm gloves are not left soaked after cleaning → squeeze out excess moisture gently and pad with a dry towel.
- Low-heat airflow: can reduce drying time without typically softening adhesives.
- High heat: can melt adhesives and cause delamination.
Post-Session Drying Routine That Prevents Mold in Boxing Gloves
Drying your boxing gloves after every session is the main way to prevent mold. The routine focuses on the glove interior first, where sweat and moisture collect.
The image shows how to position gloves for better airflow during this drying routine.
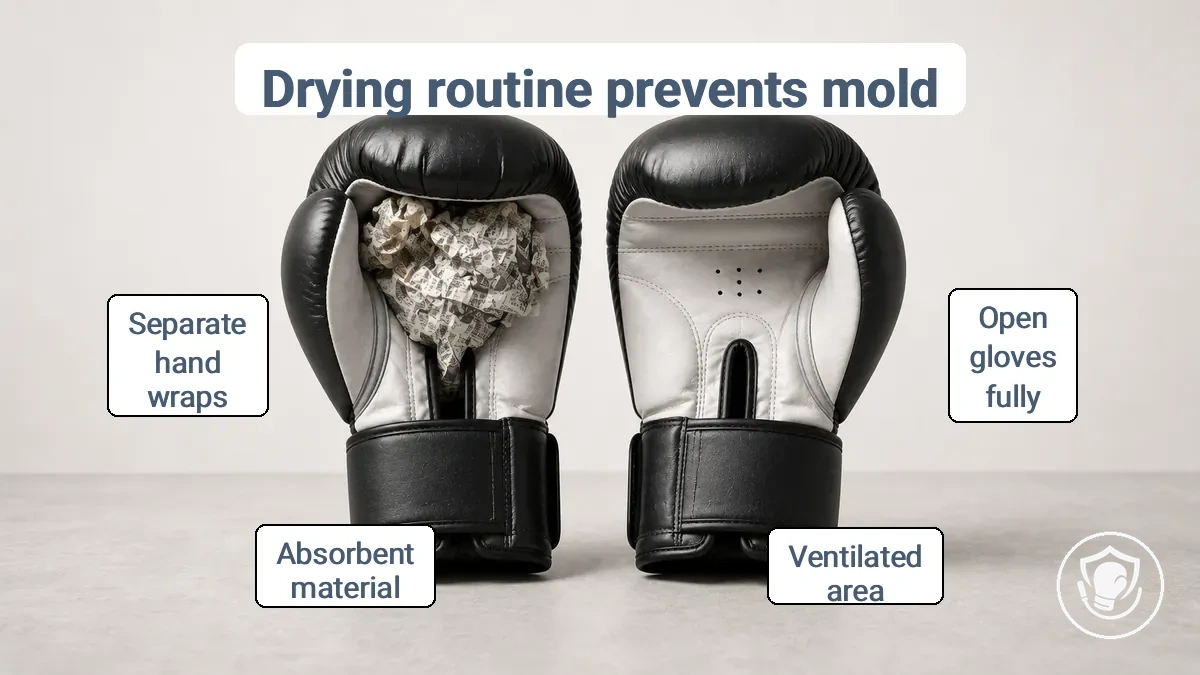
- Open the gloves fully by unlacing or unstrapping the closure — this allows airflow to reach the glove interior.
- Place the gloves in a well-ventilated area, not inside a closed gym bag. Trapped humidity slows drying and increases mold risk.
- Insert an absorbent material like crumpled newspaper to pull moisture from the lining.
- Keep hand wraps separate from the gloves during drying — they hold extra dampness that can transfer back into the glove interior.
- Check that the glove interior feels dry to the touch before the next session — incomplete drying increases the risk of odor and mold growth.
To check for dryness, look for these signs:
- Dryness signals: The lining feels cool and dry, with no condensation when you press the padding.
- Still damp signals: The interior feels clammy, or you see visible moisture spots on the fabric.
Drying time varies with humidity and ventilation — allow more time in humid rooms. Never seal damp gloves in a bag or locker.
Air-Drying Technique for Glove Lining and Shape Retention
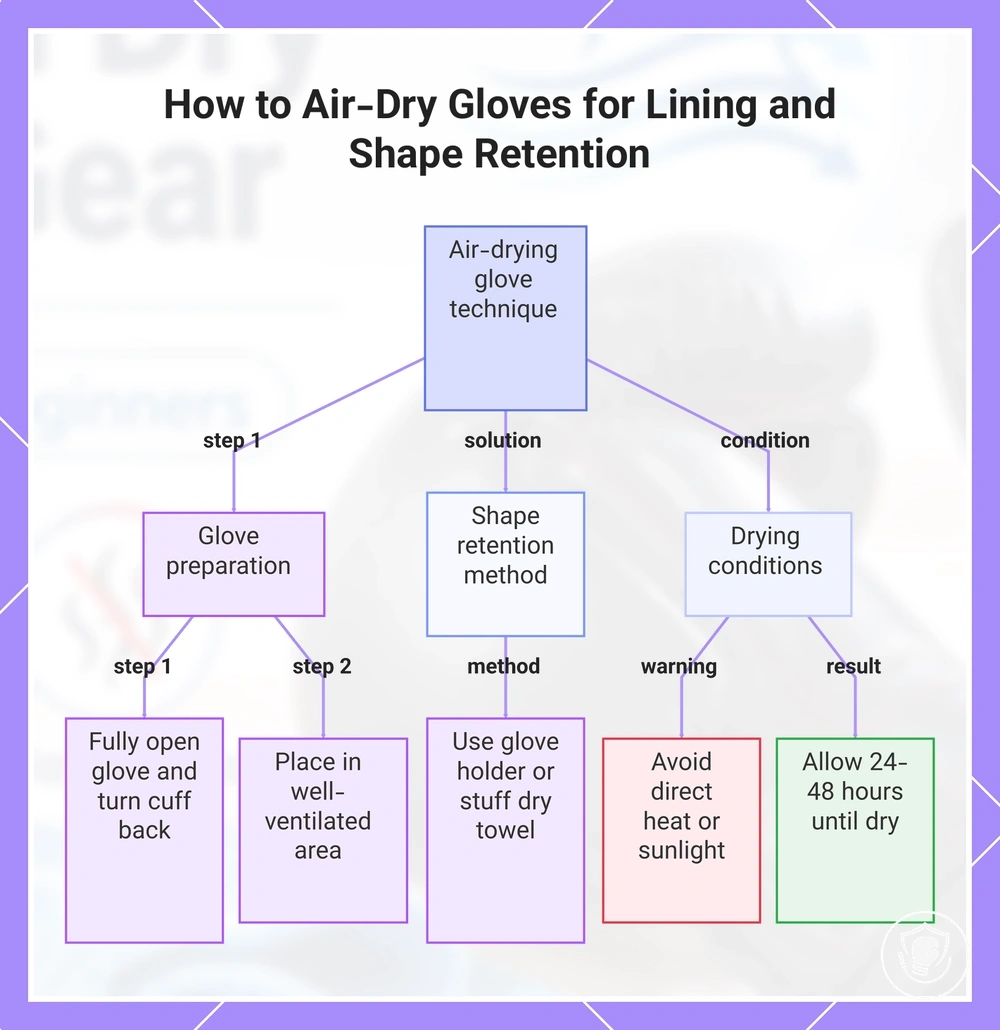
To air-dry your gloves for lining and shape retention, fully open the glove and keep the opening open so airflow reaches the interior lining. Drying speed depends on room airflow and humidity, so choose a well-ventilated spot away from direct heat or sunlight.
- Open the glove fully, turning the cuff back if possible.
- Place the glove in a well-ventilated area, such as near a fan or an open window.
- Use a glove holder or loosely stuff a dry towel into the pocket to help maintain the shape and allow air to circulate around the padding.
- Allow the glove to air-dry, typically 24 to 48 hours, or until the lining feels completely dry to the touch.
This chart shows the proper technique for air-drying gloves to maintain lining dryness and shape, including preparation, shape retention method, and required conditions.
Using Glove Dryers and Airflow Aids Without Heat Damage
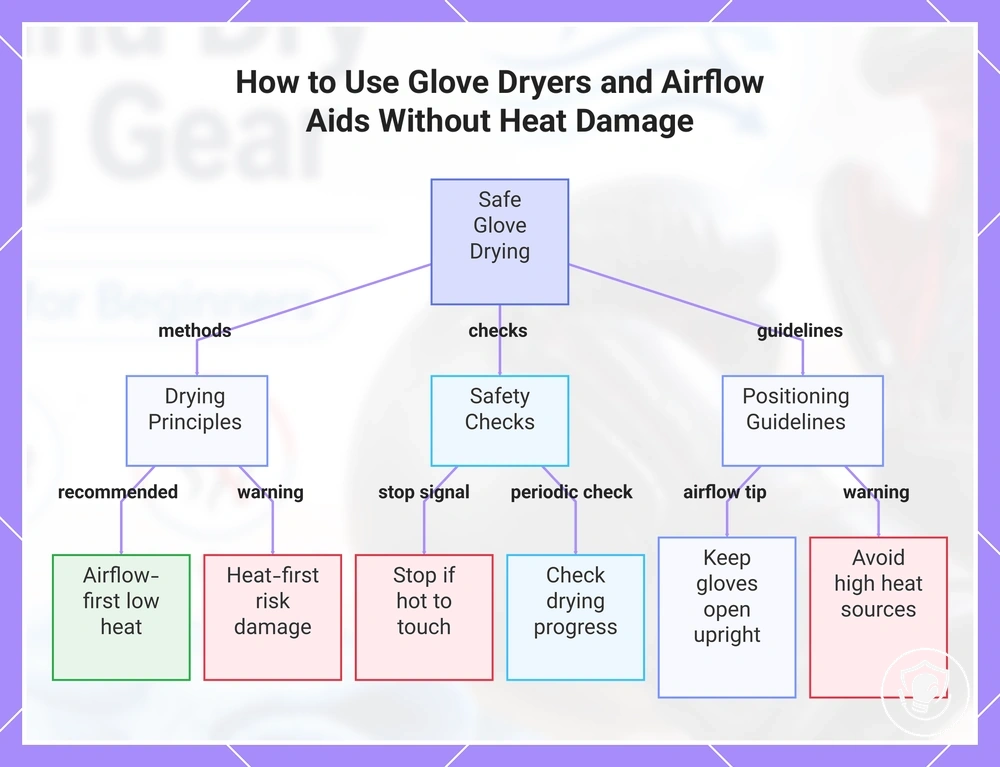
Airflow aids help most when they increase ventilation rather than heat. The goal is to remove moisture using low heat and continuous airflow to reduce the risk of damaging the lining or foam. These rules help you use airflow aids without heat damage and reduce the risk of overheating your gloves.
- Use a glove dryer or other airflow aid with low heat and steady ventilation to help dry gloves safely.
- Airflow-first: Rely on moving air at low temperature to remove moisture gradually. Heat-first: Turning up the temperature risks shrinking liners or melting foam.
- A stop signal: if the glove becomes hot to the touch, stop drying immediately to reduce the risk of damage.
- Drying speed depends on lining thickness and ambient humidity — check gloves periodically instead of running a full cycle blindly.
- Keep gloves open and upright so air flows into the fingertips; this improves ventilation and reduces the need for higher heat.
- Avoid placing gloves near heaters or high‑heat sources; even a short exposure can stiffen materials and reduce insulation.
This chart shows the key drying principles, safety checks, and positioning guidelines for drying gloves with airflow aids without causing heat damage.
Cleaning boxing gloves without damaging the exterior or interior
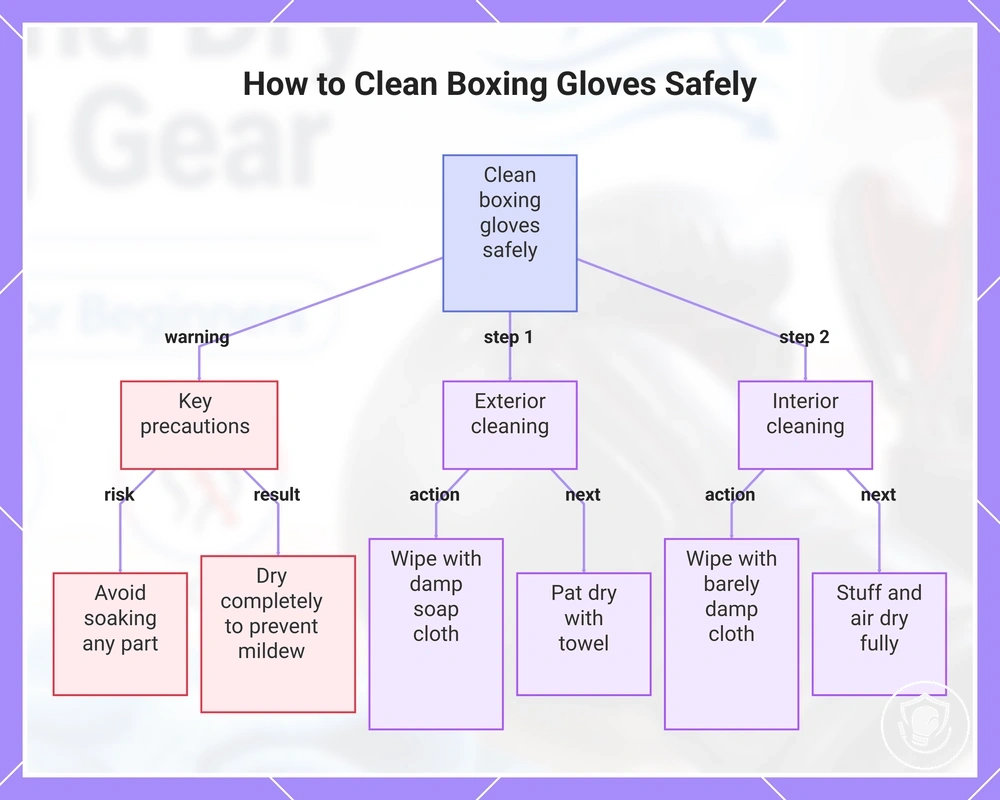
Cleaning boxing gloves safely starts with wiping down the exterior and interior, then drying the gloves completely. Use a damp cloth with a drop of mild soap for the exterior and a lightly damp cloth for the interior lining. Keep moisture minimal and avoid soaking any part of the glove. Let them air out until fully dry.
After a training session, sweat and bacteria can build up against the glove lining. Wiping both exterior and lining with a damp cloth prevents residue and controls odor. Avoid soaking, as saturated foam takes too long to dry and can lead to mildew or padding breakdown.
Cleaning boxing gloves means treating the exterior and interior separately. Use these steps to clean them safely:
- Exterior wipe: Dampen a clean cloth with warm water and a drop of mild soap. Wring it out well so it is lightly damp. Wipe the entire exterior, including the cuff and any leather or synthetic surfaces.
- Exterior dry: Pat the exterior dry with a towel.
- Interior wipe: Use a barely damp cloth (water only, or a touch of mild soap) for the glove lining. Wipe the palm, thumb pocket, and finger areas. Do not let water drip into the glove.
- Interior dry: Stuff the glove with a dry cloth or paper towel to absorb remaining moisture, then leave it open in a ventilated area to dry completely.
- Routine wipe after training: Quick exterior and interior wipe with minimal moisture, then air out.
- Deeper reset when odor builds: If a strong smell develops, use a damp cloth with a little diluted vinegar for the exterior, and sprinkle baking soda inside overnight to absorb odors. Shake out thoroughly before the next session.
This chart shows the key precautions and step-by-step process for cleaning boxing gloves without damaging the exterior or interior.
Exterior cleaning and sweat-salt removal after training
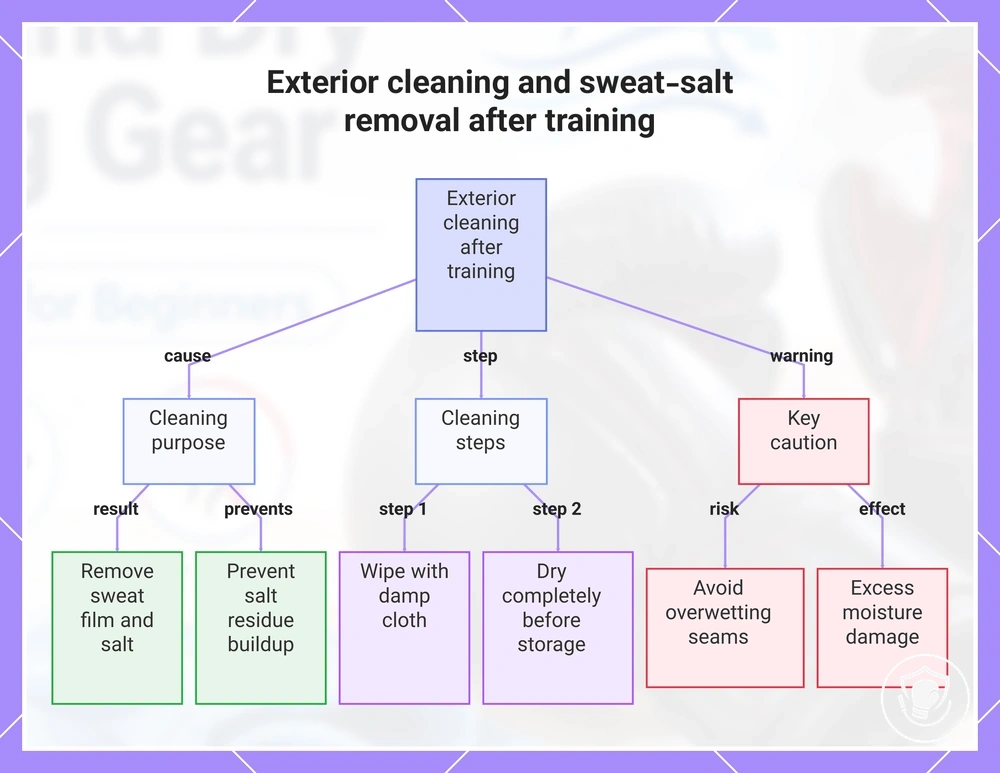
Exterior wipe-down removes sweat film and salt from the glove exterior surface, preventing salt residue buildup that can stiffen materials over time. A quick wipe after each session helps prevent salt residue from forming a gritty layer.
Use a damp cloth to wipe down the entire glove exterior, focusing on areas where sweat collects. Then dry the surface with a clean towel and allow the equipment to air dry completely before storage. Be careful not to overwet the seams, stitching, or strap closures, as excess moisture can damage these areas over time.
This chart shows the purpose, key steps, and important caution for cleaning the glove exterior to remove sweat and salt after training.
Interior wipe-down and drying reset when odor builds up
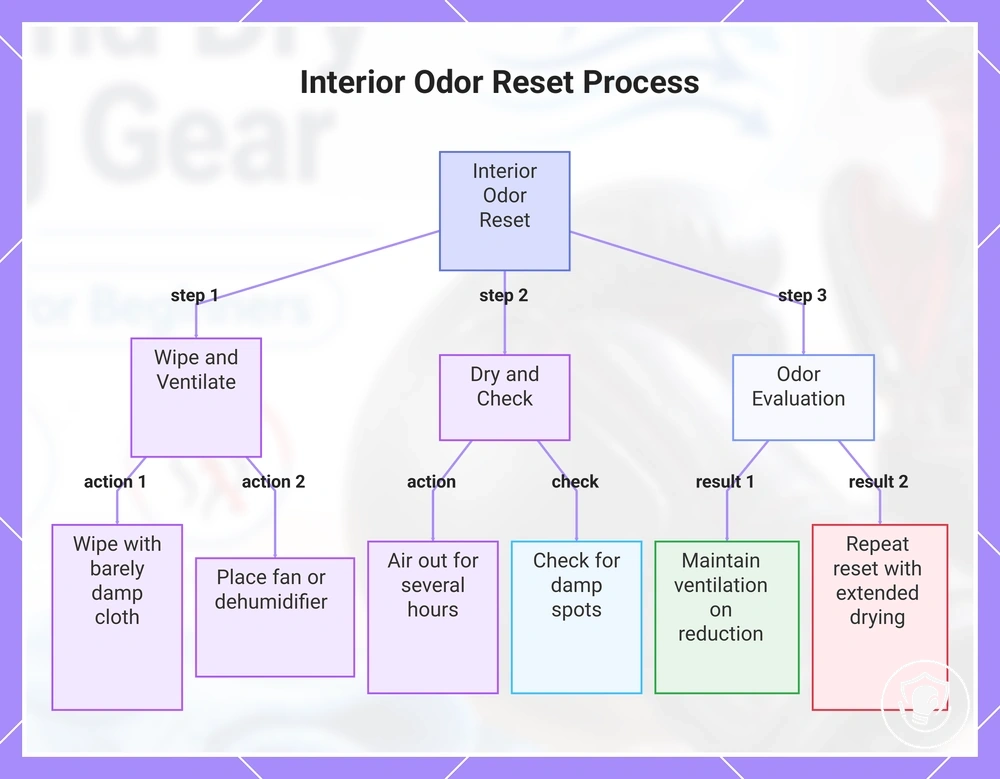
Persistent interior odor usually means the glove lining stayed damp or wasn’t ventilated long enough. The reset process minimizes added moisture while maximizing airflow and drying time, so it may need to be repeated over multiple sessions rather than expecting a one-try fix. Use the following interior drying reset when odor builds up, keeping each action focused on minimal moisture and ventilation.
- Wipe the interior lining with a barely damp microfiber cloth to limit added moisture. Immediately after, leave the glove open in a ventilated area to allow airflow.
- Place a fan or dehumidifier near the glove to increase airflow and speed drying of the lining.
- Allow the glove to air out for several hours in a dry, ventilated area to allow the lining to dry fully.
- Check the lining for any remaining damp spots. If still moist, repeat the wipe-down with even less water and continue drying.
- Once the lining feels completely dry, close the glove and evaluate the odor level. If the odor persists, plan to repeat the entire reset routine after the next use to prevent buildup.
- Odor reduced: maintain regular ventilation between uses.
- Odor returns: repeat the reset process, extending drying time and increasing airflow.
This chart shows the step-by-step interior odor reset process for gloves, covering wiping, drying, and evaluation with follow-up actions.
Hand Wraps: Washing Method, Detergent Choice, and Faster Drying
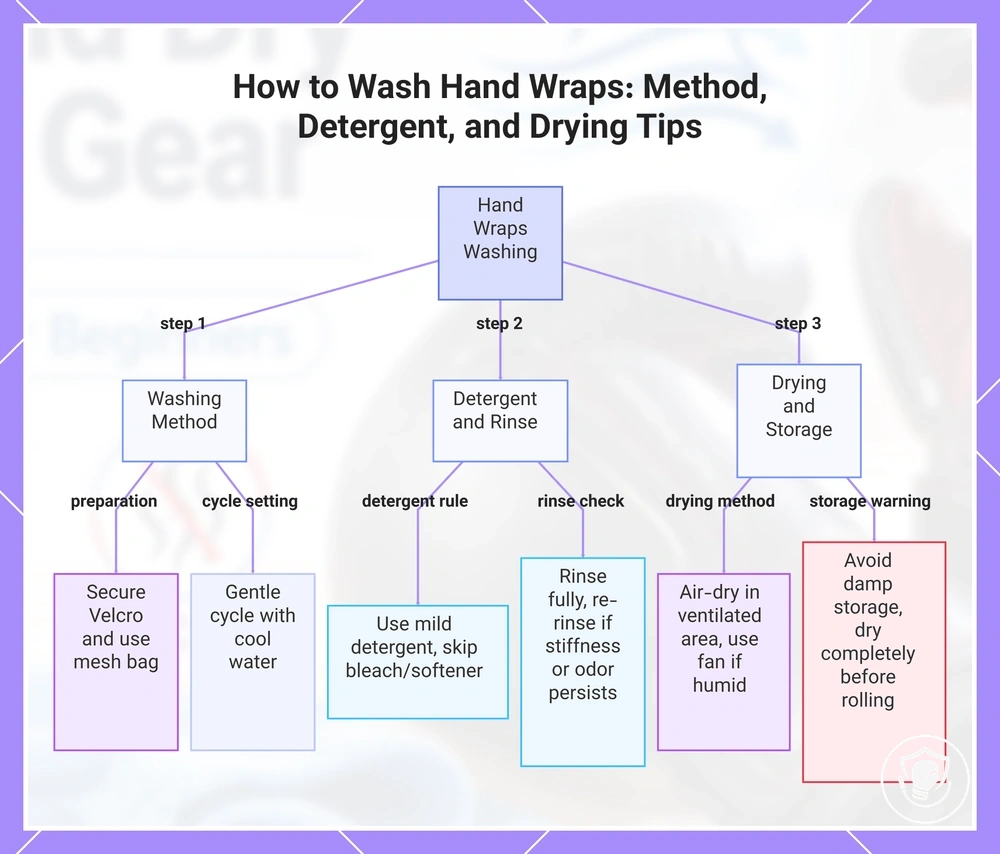
Hand wraps should be washed regularly because they retain sweat and can transfer odor back into gloves. The fabric can absorb moisture and bacteria during each session; without proper cleaning, that buildup can lead to stiffness, skin irritation, and lingering smells. Regular washing keeps the wraps supportive and comfortable.
- Secure the Velcro and place wraps in a mesh laundry bag.
- Wash on a gentle cycle with cool water, adjusting based on fabric care label.
- Use a mild detergent and skip bleach and fabric softener.
- Rinse fully to remove all detergent residue.
- Remove wraps promptly and unroll them completely for drying.
For faster drying and to avoid damp storage, follow this checklist to prevent odor transfer and extend wrap life.
- Air-dry wraps in a well-ventilated area with good airflow.
- Use a fan to speed drying in humid conditions.
- Avoid direct sunlight and do not use a tumble dryer or radiator.
- Wait until wraps are completely dry before rolling or storing.
- Avoid storing damp wraps in a sealed bag.
If wraps feel stiff or still smell after washing, the rinse may be incomplete. Rinse again with fresh water and ensure thorough drying before the next session.
This chart shows the key steps for washing hand wraps, including proper washing method, detergent choice, and drying techniques to prevent odor and extend wrap life.
Odor control products and when they actually help
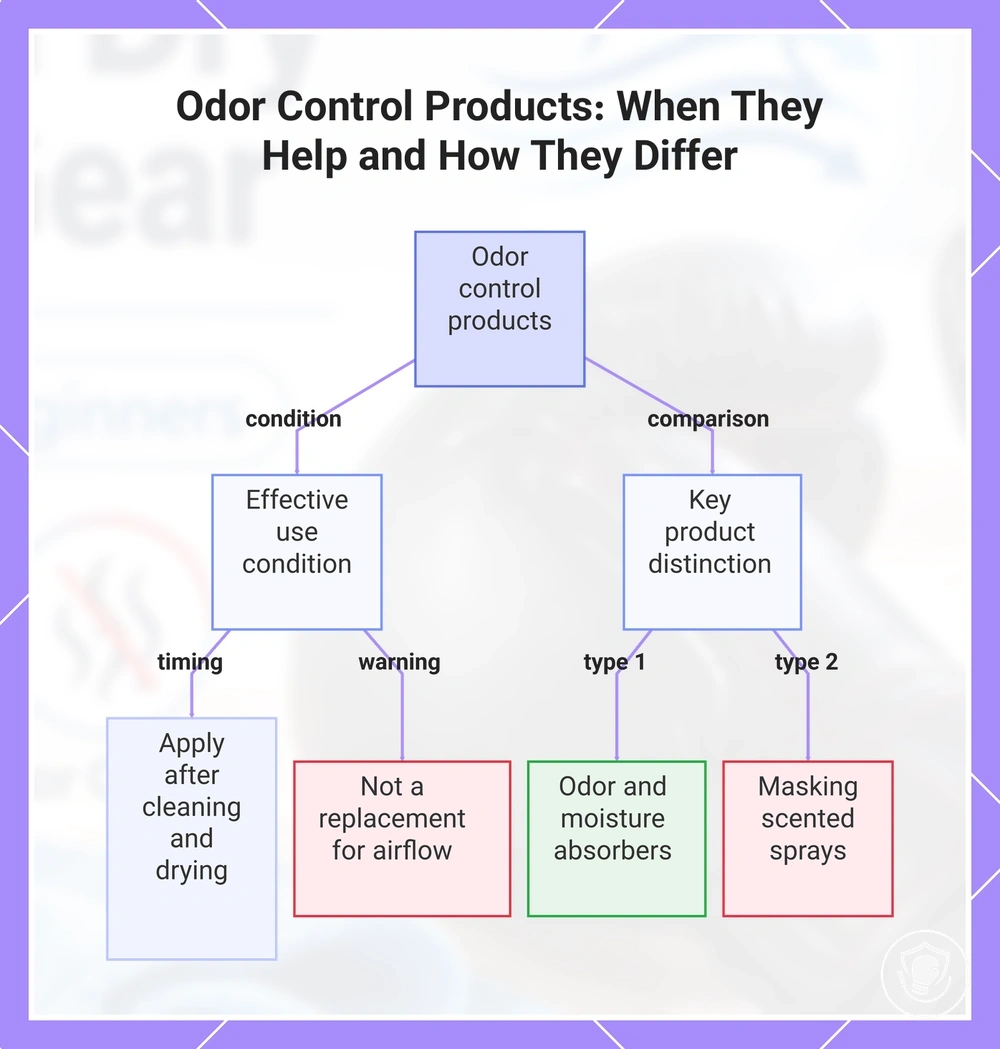
Odor control products help most after cleaning and drying—not as replacements for airflow. They help keep glove linings in good condition, protect adhesives from moisture damage, and reduce the risk of skin contact irritation from trapped odors.
- Deodorizing sprays: can be applied to the glove lining after a wash and thorough drying; they freshen light odors but may leave residue if overused.
- Absorbent powders: absorb moisture inside gloves, reducing dampness that supports odors; they may clump in high humidity and need even distribution.
- Odor remover wipes: offer quick convenience but risk leaving dampness; the glove must dry fully before storage to avoid mildew.
- Gel-based deodorizers: can be placed in a gear bag for continuous odor absorption; they require ventilation to evaporate and may not work in sealed containers.
- Activated charcoal pouches: absorb odors passively without contacting the glove material; they are typically safe for adhesives but lose effectiveness and need periodic replacement.
- Essential oil sprays: can reduce smell when used sparingly on the outer shell; they may irritate skin if applied directly to linings and should be tested first.
A scented spray does not eliminate odor—it masks it. Once the fragrance fades, the original smell returns. Products that control moisture or absorb odors can be more effective because they reduce odor drivers rather than just adding fragrance.
This chart shows the proper use condition for odor control products and the key difference between masking and odor-absorbing products.
Deodorizers and odor removers as maintenance support, not a substitute for drying
Deodorizers are most useful when your gloves are already dry and you need between-session support. They absorb residual odors from sweat and moisture, but only after gloves are dry.
Deodorizers have a limitation: they cannot fix ongoing dampness. Applying them to damp gloves traps moisture, and odor quickly returns. Deodorizers work only on dry gloves.
Antibacterial wipes for boxing gloves: safe use and common mistakes
Antibacterial wipes can support quick cleaning when they are skin-safe and don't leave the glove lining damp. Ventilate after wiping.
Safe use and common mistakes for antibacterial wipes depend on proper application and drying afterward. Wipes are for quick cleanup, not for soaking the interior.
- Safe-use rules: Choose wipes labeled as skin-safe and compatible with sports gear materials.
- Gently wipe the exterior and interior without saturating the lining; focus on areas where sweat collects.
- If the wipe leaves the lining damp, ventilate longer until it is completely dry before storing.
- Opt for wipes without harsh ingredients like bleach or ammonia to avoid residue and material wear.
- Common mistakes: Using wipes that leave a sticky residue, which can trap moisture and cause odors.
- Wiping then immediately sealing gloves in a bag, locking in dampness and promoting bacteria growth.
- Applying industrial disinfectants or household cleaner wipes that can degrade stitching and foam.
- Over-saturating the glove lining, making it difficult to dry fully and leading to persistent dampness.
Storage and Ventilation Habits That Keep Gear Dry Between Sessions
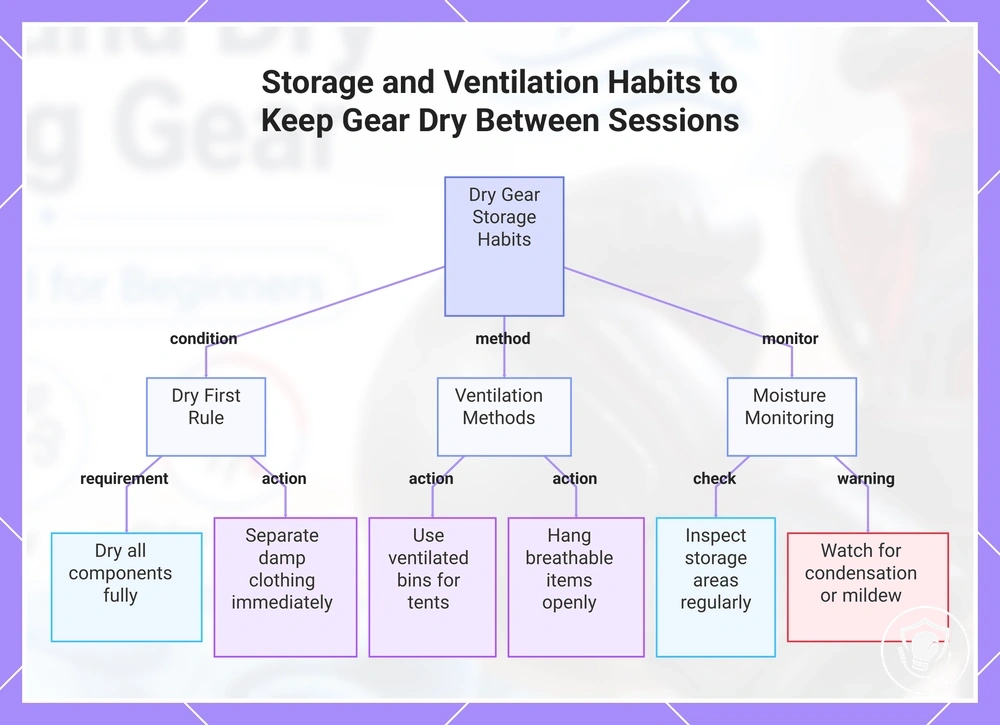
Storage should maximize ventilation and keep gear away from damp clothing. How you store gear between sessions decides if drying completes or moisture stays trapped. Without enough airflow, residual humidity can cause mildew and odor. Dry first, then store.
These storage and ventilation habits help prevent trapped moisture and keep your gear ready for the next session.
- Store gear only when every component is fully dry, including stuff sacks and straps.
- Use ventilated storage bins for tents and sleeping pads. Airtight containers trap humidity against fabric coatings, which can accelerate breakdown.
- Keep gear bags loosely closed to allow airflow; seal them only when fully dry for extended storage.
- Place moisture-absorbing materials like silica gel packs inside storage containers. They help control humidity in enclosed spaces.
- Hang breathable items such as backpacks and jackets in a dry, open area rather than stuffing them into a closed bin. Air circulation speeds any remaining drying.
- Store footwear with insoles removed and laces loosened. Stuff loosely with newspaper or boot trees to wick interior moisture.
- Separate damp or sweaty clothing from dry gear immediately after a session.
- Inspect storage areas periodically for signs of moisture, especially after seasonal changes. Adjust ventilation or add desiccants if needed.
- Good storage signs: equipment feels dry to the touch, no musty smell, containers have airflow or vents.
- Bad storage signs: condensation inside bags, mildew spots on fabric, persistent dampness in the storage area.
This chart outlines the essential storage habits to prevent moisture buildup, including drying rules, ventilation methods, and monitoring tips.
Persistent odor or visible mold: causes, fixes, and when replacement is the safer option
Persistent odor or visible mold in boxing gear usually indicates unresolved moisture retention or contamination. Cleanup should focus on safe triage, not aggressive chemicals that may damage materials or irritate skin. Lowest-risk first step: dry thoroughly and clean with mild detergent.
When mild cleaning fails and the musty odor returns, the cause is likely deeper mold growth inside the damp lining that cannot dry fully between uses. Visible spots that reappear after cleaning also point to moisture trapped in padding.
The table matches common symptom patterns for persistent odor or visible mold to likely causes and safer next steps. Replacement becomes the safer option when the lining cannot be dried completely—see replacement signs for worn gear—and when mold recurs after multiple cleanings or material shows signs of breakdown. Decisions depend on extent, recurrence, and full drying capability.
| Symptom | Likely cause | Safer check | Next step |
|---|---|---|---|
| Odor returns after cleaning | Moisture trapped inside lining | Press padding to feel for dampness | Air-dry for at least 48 hours; repeat cleaning |
| Damp feel inside lining | Insufficient drying after use | Check if lining stays wet for more than about 2 hours | Improve ventilation; use a dehumidifier in storage |
| Musty smell after storage | Mold spores reactivating in humid storage | Inspect for hidden damp spots | Store in a dry area with silica gel packs |
| Visible spots on surface | Surface mold from sweat residue | Wipe with vinegar-water solution | Clean and dry; if spots return, replace |
| Odor only after wrapping | Bacteria or mold on wraps, not glove itself | Smell wraps separately | Wash wraps; let gloves air out |
See beginner equipment FAQs for further guidance.